
Connecting Ball Valves to PEX, Copper & PVC: Your How-To Guide for Leak-Free Transitions
The plumbing world is a blend of tradition and innovation. While robust ball valves often feature classic threaded connections, modern piping systems frequently utilize materials like flexible PEX, durable copper, and cost-effective PVC or CPVC. Bridging the gap between these different material types and connection methods is a common task for DIYers, plumbers, and technicians alike.
This comprehensive guide from BCST Valve will walk you through the specifics of connecting threaded ball valves to PEX, copper, and PVC piping. We’ll explore the essential adapter types and the step-by-step techniques to ensure a secure, long-lasting, and leak-free installation. For a broader understanding of all ball valve adapter challenges, don’t miss our Complete Guide to Ball Valve Adapters.
Why Are Material Transition Adapters Essential?
Each piping material offers distinct advantages, leading to their widespread use:
- PEX (Cross-linked Polyethylene): Flexible, affordable, corrosion-resistant, and easier to install with fewer fittings compared to rigid pipes.
- Copper: Highly durable, heat-resistant, antimicrobial, and proven reliable over decades.
- PVC (Polyvinyl Chloride) / CPVC (Chlorinated Polyvinyl Chloride): Economical, corrosion-resistant, and suitable for a range of temperatures and pressures (CPVC for higher temps).
While ball valves are versatile, their most common form comes with threaded ends. Adapters serve as the crucial link, allowing these robust valves to integrate safely and efficiently into any of these modern systems, maintaining the integrity and performance of the overall fluid path.
Connecting Ball Valves to PEX Pipes
Step 1: Understand PEX Connection Methods
PEX offers several connection methods, each requiring a specific adapter type:
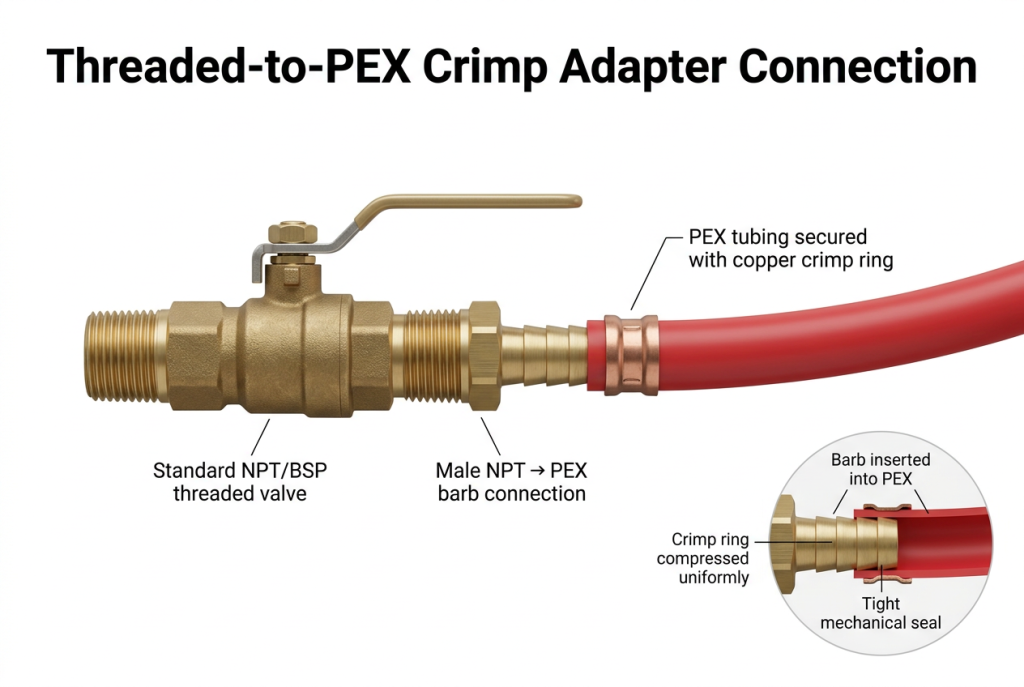
- Crimp/Clamp:** Uses a brass or poly fitting, a crimp/clamp ring (copper or stainless steel), and a specialized tool. Very common and reliable.
- Expansion (PEX-A): For PEX-A pipe only, this method uses a tool to expand the pipe and fitting, then allows the pipe to shrink back, creating a very strong seal.
- Push-to-Connect: Tool-free, allowing for quick and relatively easy connections. Often slightly bulkier and more expensive, but highly convenient.
Step 2: Choose Your Threaded-to-PEX Adapter
Select an adapter that has the correct male or female NPT/BSP thread on one end to match your ball valve, and the corresponding PEX connection type on the other (e.g., a “3/4 NPT Male x 1/2 PEX Crimp” adapter).
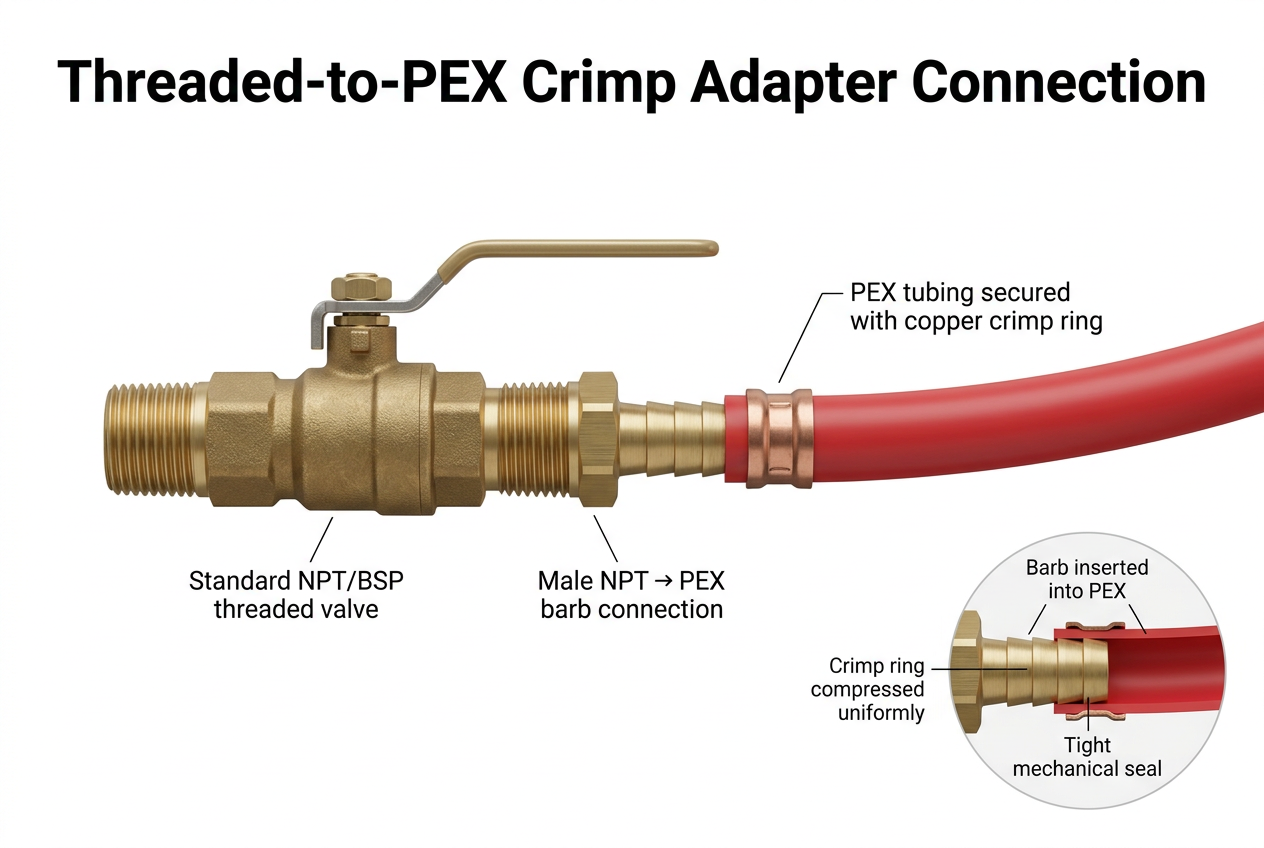
Step 3: Installation Steps (Example: Crimp Connection)
- Prepare Valve Connection: Apply 2-3 wraps of PTFE (Teflon) tape clockwise to the male threads of your ball valve (or adapter if the valve is female threaded). Apply pipe dope over the tape for extra sealing.
- Attach Adapter to Valve: Thread the PEX adapter onto the ball valve (or vice-versa). Hand-tighten, then use wrenches to turn an additional 1-2 rotations for a secure seal.
- Prepare PEX Pipe: Cut the PEX pipe cleanly and squarely using a PEX cutting tool. Ensure there are no burrs.
- Install Crimp Ring: Slide the crimp ring onto the PEX pipe, about 1/8″ to 1/4″ from the end.
- Insert PEX into Adapter: Push the PEX pipe fully onto the barb fitting of the adapter until it bottoms out.
- Crimp Connection: Position your crimp tool over the crimp ring and squeeze the handles firmly until the tool clicks or reaches its stop. Verify the crimp with a go/no-go gauge.
Connecting Ball Valves to Copper Pipes
Step 1: Understand Copper Connection Methods
Copper piping offers robust connection options:
- Sweat (Solder): A traditional, strong, and permanent connection made by soldering copper pipe into a fitting. Requires heat.
- Compression: Uses a compression nut and ferrule (sleeve) to create a mechanical seal around the pipe. No heat required, good for DIY.
- Push-to-Connect: Similar to PEX, these fittings offer tool-free, quick connections.
Step 2: Choose Your Threaded-to-Copper Adapter
Select an adapter with the correct NPT/BSP threads on one side and the desired copper connection (sweat, compression, or push-to-connect) on the other. For example, a “1 inch NPT Female x 1 inch Copper Sweat” adapter.
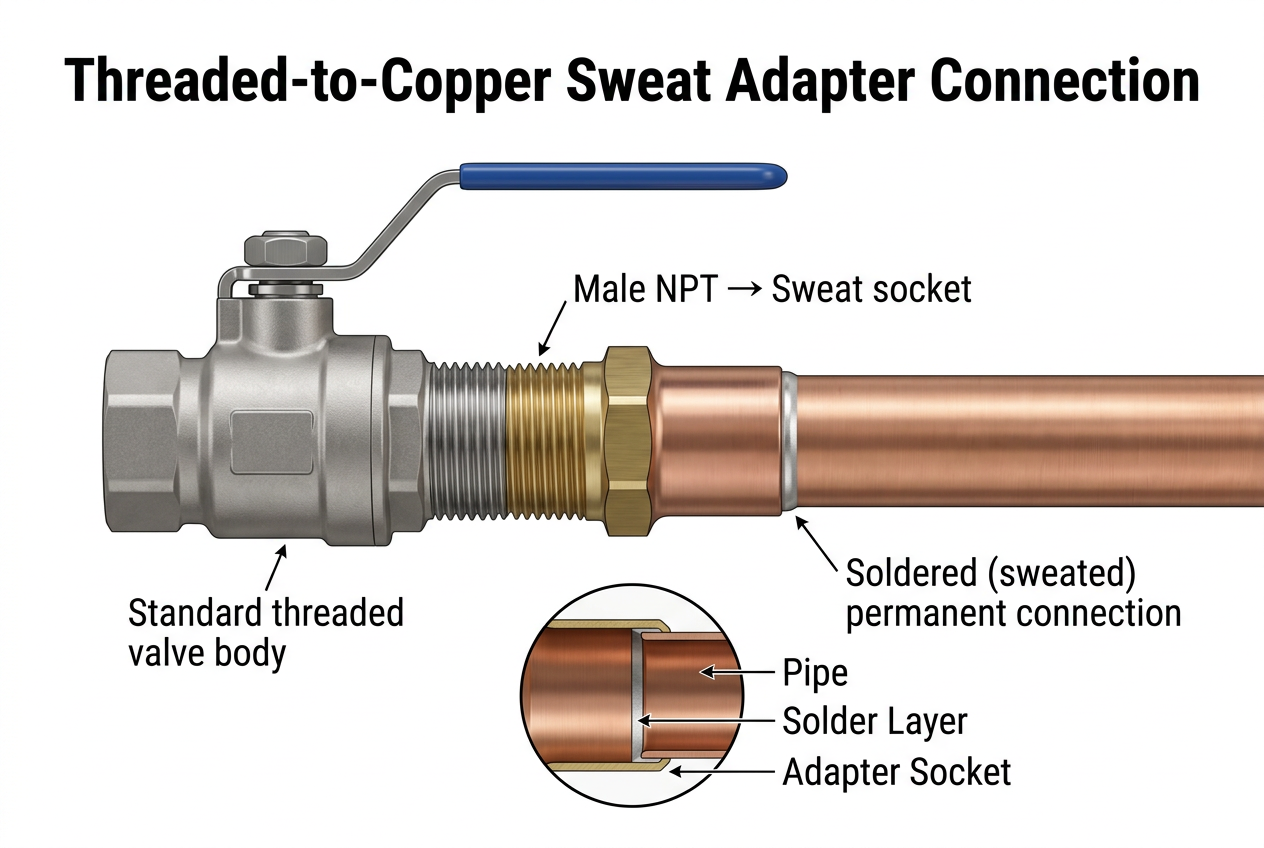
Step 3: Installation Steps (Example: Sweat Connection)
- Prepare Valve/Adapter Threads: Apply PTFE tape and pipe dope to the threaded side of the adapter, then thread it securely onto your ball valve (as with PEX).
- Prepare Copper Pipe & Adapter: Cut copper pipe squarely with a pipe cutter. Clean both the outside of the copper pipe and the inside of the adapter’s sweat connection thoroughly with sandpaper or an abrasive pad until shiny. Apply a thin, even coat of flux to both cleaned surfaces.
- Assemble & Solder: Insert the copper pipe completely into the adapter’s sweat connection. Using a propane or MAPP gas torch, heat the joint evenly. Once the joint is hot enough, touch the solder to the joint (not the flame). The solder should melt and be drawn into the joint by capillary action, creating a complete seal around the entire circumference. Wipe away excess solder with a rag while hot.
- Cool & Clean: Allow the joint to cool naturally. Do not touch or disturb the joint while it’s cooling. Once cool, wipe down the area to remove any flux residue.
Connecting Ball Valves to PVC & CPVC Pipes
Step 1: Understand PVC/CPVC Connection Methods
PVC and CPVC primarily use these methods:
- Solvent Weld (Glue): The most common method, using chemical solvents to ‘weld’ pipes and fittings together. This creates a very strong, permanent bond.
- Threaded: PVC and CPVC fittings are available with male or female threads for mechanical connections.
Step 2: Choose Your Threaded-to-PVC/CPVC Adapter
You’ll typically need a Male or Female Threaded Adapter (FTA or MTA) that has NPT/BSP threads on one side and a solvent-weld socket on the other. For example, a “1/2 inch NPT Male x 1/2 inch PVC Slip” adapter.

Step 3: Installation Steps (Example: Solvent Weld Connection)
- Prepare Valve/Adapter Threads: Apply PTFE tape and pipe dope to the threaded side of the adapter, then thread it securely onto your ball valve. Remember, plastic threads can strip easily; do not over-tighten!
- Prepare PVC/CPVC Pipe & Adapter: Cut the pipe cleanly and squarely. Deburr the edges. Dry-fit the pipe into the adapter to ensure it fits snugly. Mark the insertion depth on the pipe. Using a dauber, apply an even coat of PVC/CPVC primer to both the outside of the pipe end and the inside of the adapter’s socket.
- Apply Cement & Join: Immediately after priming, apply a generous, even coat of PVC/CPVC cement to both the primed pipe end and the adapter’s socket. Quickly push the pipe fully into the adapter socket, giving it a quarter turn to spread the cement evenly. Hold for 15-30 seconds to allow the cement to set.
- Cure Time: Allow adequate cure time before pressurizing the system (check cement manufacturer’s instructions – often 30 minutes to several hours depending on pipe size and temperature).
General Best Practices for Any Adapter Installation
- Safety First: Always shut off the water supply and drain the lines before beginning work. Wear appropriate PPE (safety glasses, gloves).
- Propreté : A clean surface is paramount for solvent weld and sweat connections. For threaded connections, prevent sealant from entering the flow path.
- Right Tools for the Job: Use specialized tools (PEX crimpers, pipe cutters, torch) for each material.
- Mind the Threads: Use the correct thread standard (NPT vs. BSP) and apply appropriate thread sealant. Do not over-tighten plastic threaded fittings.
- Compatibilité des matériaux : Ensure your adapter material is compatible with the fluid, pressure, temperature, and surrounding pipe materials.
- Pressure Testing: After installation, slowly restore pressure and inspect all new connections for leaks. Rectify any leaks immediately. For complex systems, a full pressure test may be required.
Conclusion
Effectively connecting ball valves to a variety of modern piping materials like PEX, copper, and PVC is a crucial skill for any plumbing project. By choosing the correct adapters and meticulously following the specific installation techniques for each material, you can achieve durable, leak-free transitions that ensure the longevity and efficiency of your fluid systems.
BCST Valve offers a comprehensive selection of high-quality ball valves and the necessary adapters to facilitate these essential connections in both residential and industrial applications. Our products are engineered for reliability, giving you confidence in every installation.
Need reliable valves and fittings for your next project?
“`


 English
 Arabic
 Russian
 French
 Spanish