
Marine Ball Valve Maintenance & How to Free a Seized Valve: A Comprehensive Guide
Onboard a vessel, marine ball valves and seacocks are indispensable components of the plumbing system, controlling everything from engine cooling water to head discharge. Their ability to quickly isolate a through-hull fitting or a critical fluid line is paramount for safety. However, the harsh marine environment—with its saltwater, corrosion, and biological growth—can quickly degrade these mechanisms, leading to stiff or seized valves. A seized valve isn’t just an inconvenience; it’s a serious safety hazard, preventing crucial shut-offs in an emergency. According to a statistics from roymech, Ball valves have a base failure rate of 0.5 failures per 10⁶ hours (approximately 0.5 per 114 years of continuous operation) according to reliability engineering data.
This guide from BCST Valve will walk you through the essential maintenance practices to prevent marine ball valves and seacocks from seizing, and provide a detailed, safe approach to freeing a stuck valve when the inevitable happens. Proper selection and installation are the first steps, but long-term reliability depends on diligent care. For a deeper understanding of these critical components, refer to our comprehensive guide: The Complete Guide to Marine Ball Valves & Seacocks.
Why Marine Valve Maintenance is Essential
Neglecting marine valves can lead to several critical issues, compromising both safety and operational efficiency:
- السلامة: A valve that can’t be closed means an uncontrolled leak or entry point for seawater, potentially leading to flooding.
- Longevity: Regular maintenance significantly extends the lifespan of expensive brass, bronze, or composite valves.
- Operational Readiness: Ensures that systems can be isolated quickly for repairs, winterization, or in an emergency.
- Prevents Costly Replacements: Proactive care is far cheaper and less disruptive than emergency repairs or full valve replacements.
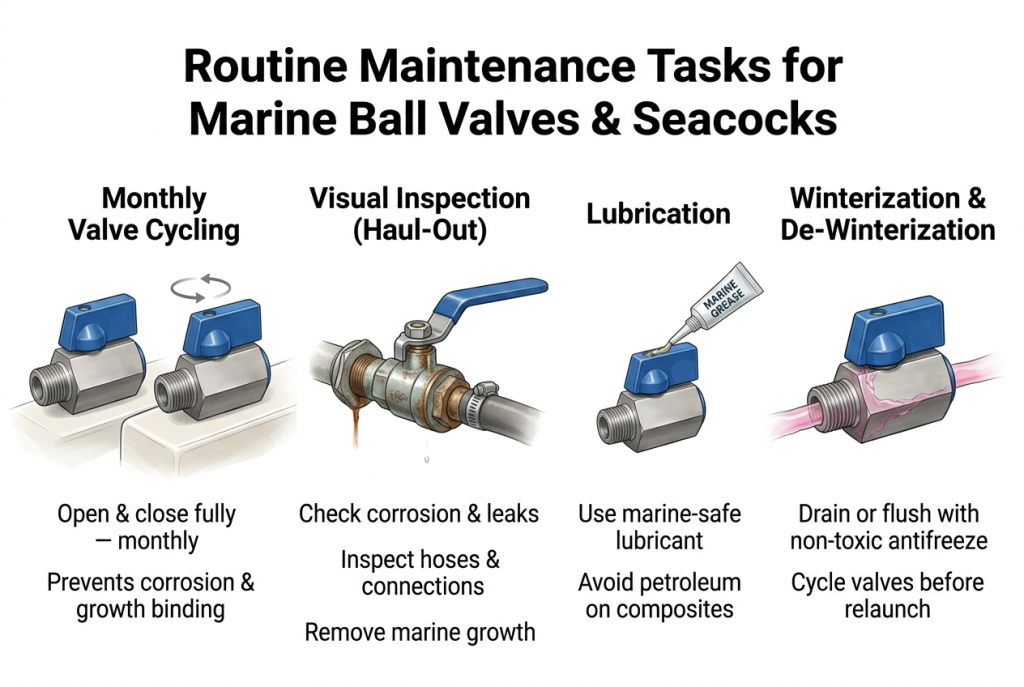
Routine Maintenance Tasks for Marine Ball Valves and Seacocks
Integrating these simple steps into your boat maintenance routine will drastically reduce the risk of seized valves.
1. Cycle Valves Regularly (Monthly)
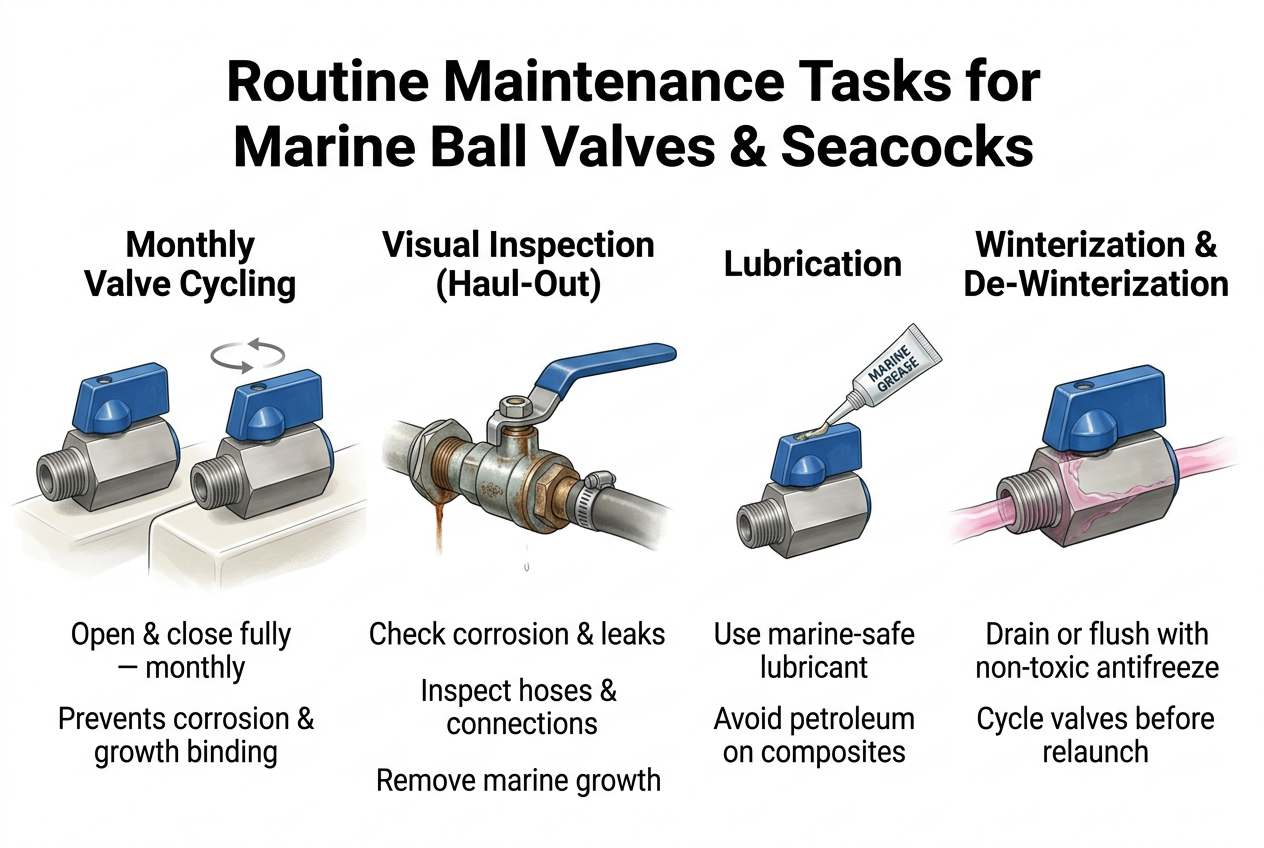
- Action: Open and close every ball valve and seacock completely, at least once a month.
- Why: This action breaks up minor corrosion and prevents marine growth from binding the ball against its seats. Neglected valves are the most prone to seizing.
2. Visual Inspection (Annually or Bi-Annually)
- Action: When the boat is hauled out, inspect all external and internal components.
- What to look for:
- التآكل: Greenish patina on bronze, rust streaks on stainless steel, or discoloration on all materials.
- Leaks: Any signs of water weeping from connections or the valve body.
- Loose Connections: Ensure thru-hulls, backing blocks, and hose clamps are secure.
- Hose Condition: Check for hardening, cracking, or swelling of hoses, especially near barb connections.
- Marine Growth: Scrape or brush away barnacles and other growth from the thru-hull scoop and valve opening.
3. Lubrication (Seasonal or As Needed)
- Action: For valves with grease fittings or accessible internal mechanisms (some older types or specific designs), apply waterproof marine grease. For composite valves or those without fittings, some marine-safe silicone-based lubricants can be sprayed into the opening while cycling.
- Caution: Ensure lubricants are compatible with valve materials (especially seals) and marine-safe. Never use petroleum-based lubricants on composite valves or fittings.
4. Winterization & De-winterization
- فصل الشتاء: Drain all water from systems containing valves/seacocks, or flush with non-toxic antifreeze, ensuring the fluid reaches and passes through the valve. Leave valves partially open if recommended by manufacturer to allow for expansion if any water remains.
- De-winterization: Flush out antifreeze, inspect for any new issues, and cycle all valves before re-launching.
Identifying a Seized Valve
A seized valve is usually obvious:
- Extreme Stiffness: Requires excessive force to turn the handle.
- No Movement: The handle is completely stuck in one position.
- Grinding/Binding Sensation: Resistance and a rough feel when attempting to turn.
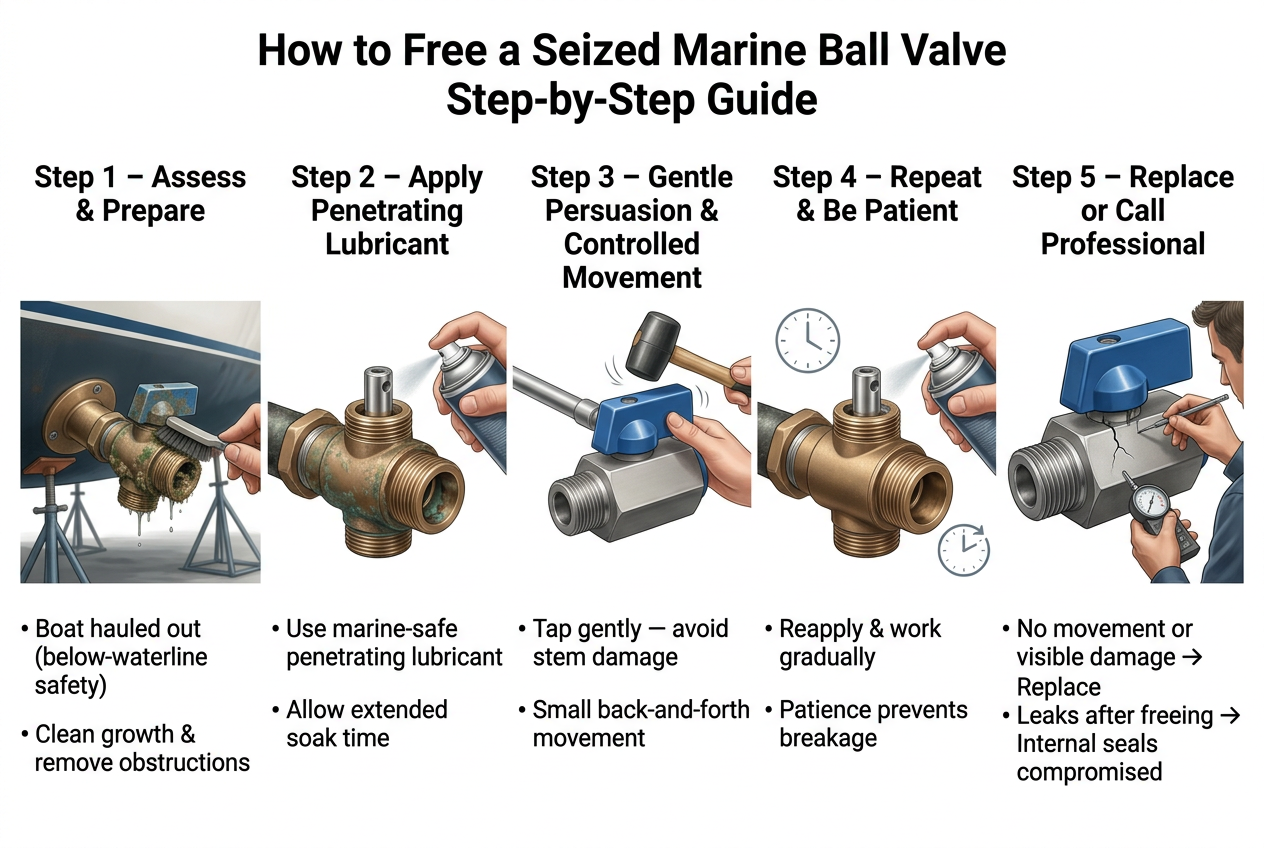
How to Free a Seized Marine Ball Valve (Step-by-Step Guide)
Attempting to free a seized valve, particularly a seacock below the waterline, carries risks. Proceed with extreme caution.
Step 1: Assess and Prepare
- Boat Hauled Out: This is non-negotiable for below-waterline valves.
- Clear Away Obstructions: Remove any hoses or fittings connected to the valve if practical and safe. Clean any external marine growth thoroughly.
- Identify Valve Type & Material: This dictates appropriate tools and lubricants. (e.g., bronze, stainless steel, Marelon).
Step 2: Apply Penetrating Lubricant
- Product Selection: Use a marine-grade penetrating oil or a high-quality silicone lubricant. Avoid general-purpose penetrating oils on composite valves without checking compatibility.
- Application: Spray generously into both ends of the valve (if accessible) and around the stem where the handle attaches. Let it soak for several hours or even overnight. Reapply periodically.
Step 3: Gentle Persuasion & Cycling
- Tap Gently: Use a rubber mallet or a block of wood and hammer to gently tap the valve body. This can help loosen corrosion without damaging the valve. Focus on the main body of the valve, not the handle or delicate parts.
- Wiggle the Handle: With steady, increasing pressure, try to gently wiggle the handle back and forth – just a few degrees each way – rather than forcing a full quarter turn. Gradual movement is key.
- Controlled Force (Caution): If the handle has a robust connection, you can try applying force with a wrench on the handle itself. However, be extremely careful not to over-torque and break the valve stem or the handle. It’s often better to *extend* the handle with a pipe for more leverage than to use tools on the valve body itself unless you know it’s designed for it.
Step 4: Repeat and Reapply
Patience is crucial. It may take multiple applications of lubricant and repeated gentle attempts over a day or two to free a stubborn valve. Keep applying lubricant and trying to work the handle in small increments.
Step 5: When to Call a Professional or Replace
- No Movement After Several Attempts: If the valve remains stubbornly seized despite your best efforts, forcing it further will likely result in breakage.
- Visible Damage: If you observe cracks in the valve body, a bent stem, or severe corrosion that compromises the valve’s integrity, it’s time for replacement.
- Leaks After Freeing: If the valve can be freed but then leaks when tested (after re-launch), the internal seals are likely compromised, indicating a need for replacement.
Replacing a seacock is a significant job, often best left to experienced marine professionals or boatyards.
Prevention is Your Best Strategy
The best way to deal with a seized valve is to prevent it from seizing in the first place. Consistent, routine maintenance—especially the monthly cycling of all valves—is your strongest defense against corrosion and binding. A little effort often saves a lot of trouble (and expense) down the line.
خاتمة
Marine ball valves and seacocks are silent guardians of your vessel’s safety. While they are built tough to withstand the rigors of the marine environment, they are not maintenance-free. Regular inspection, frequent cycling, and appropriate lubrication are crucial to ensure they perform reliably when you need them most. Should a valve seize, approach the situation cautiously and follow safe procedures, always prioritizing boat safety over quick fixes.
Invest in quality marine valves from a reputable manufacturer like BCST Valve, and commit to a proactive maintenance schedule. This combination provides the best assurance of long-term performance and peace of mind on the water.
Need reliable marine valves or expert advice?


 English
 Arabic
 Russian
 French
 Spanish