
How to Install a Push Connect Ball Valve in 5 Easy Steps
The appeal of push connect ball valves lies in their incredible simplicity and speed of installation. Gone are the days of torches, solder, or heavy crimping tools for many plumbing applications. With a push connect valve, a secure, leak-free connection can be achieved in minutes, making them a favorite for both professional plumbers and DIY enthusiasts.
This guide from BCST Valve breaks down the installation process into five straightforward steps. Follow these instructions carefully to ensure a perfect, durable connection every time, whether you’re working with copper, PEX, or CPVC piping.
Safety First & Tools Required
Before you begin, always prioritize safety:
- Turn off the main water supply to the area you’re working on.
- Open nearby faucets to relieve water pressure and drain the lines.
- Wear appropriate personal protective equipment (PPE), such as safety glasses.
Tools & Materials:
- Push connect ball valve (correct size and type for your pipes)
- Pipe cutter (rotary cutter for rigid pipes, PEX cutter for PEX)
- Deburring tool (or sandpaper/file for copper/CPVC)
- Measuring tape or depth gauge
- Marker (permanent)
- PEX stiffeners (only required when using PEX pipes)
The 5 Easy Steps to Install a Push Connect Ball Valve
Step 1: Prepare the Pipe
A clean, properly prepared pipe end is critical for a leak-free connection.
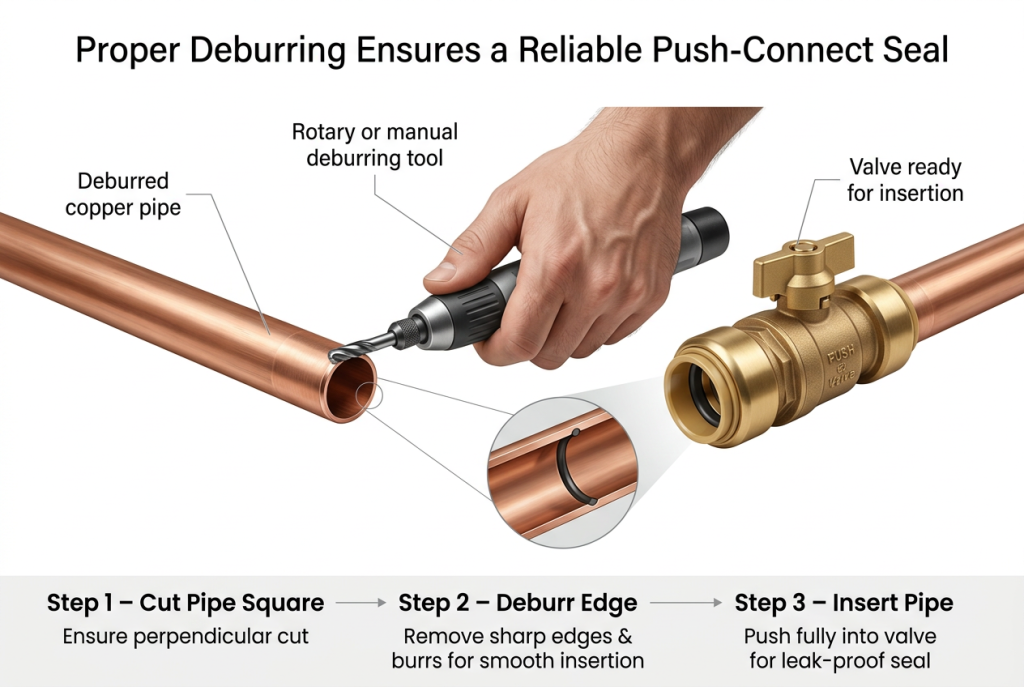
- Cut the Pipe: Using a pipe cutter, make a clean, straight cut on the pipe. Avoid jagged or angled cuts, as these can damage the valve’s internal O-ring.
- Deburr the Edges: Use a deburring tool (or fine-grit sandpaper/file) to remove any burrs or rough edges from both the inside and outside of the cut pipe. A smooth edge ensures the O-ring doesn’t get nicked during insertion.
- Clean the Pipe: Wipe the end of the pipe clean with a cloth to remove any debris, dirt, or grease.

Step 2: Measure & Mark Insertion Depth
Knowing how far to insert the pipe is crucial to engage both the grab ring and the O-ring for a secure seal.
- Use a Depth Gauge (Recommended): Many push connect fittings come with a depth gauge or include the required insertion depth in their instructions. Insert the pipe into the gauge until it stops, then mark the pipe at the edge of the gauge.
- Measure Manually: If no gauge is available, measure the recommended insertion depth from the valve’s instructions or packaging. Mark this distance from the end of the pipe using a marker.
- Insert PEX Stiffener (if using PEX): If working with PEX pipe, gently push a PEX stiffener into the cut end of the pipe.
Step 3: Push & Connect
This is where the magic happens!
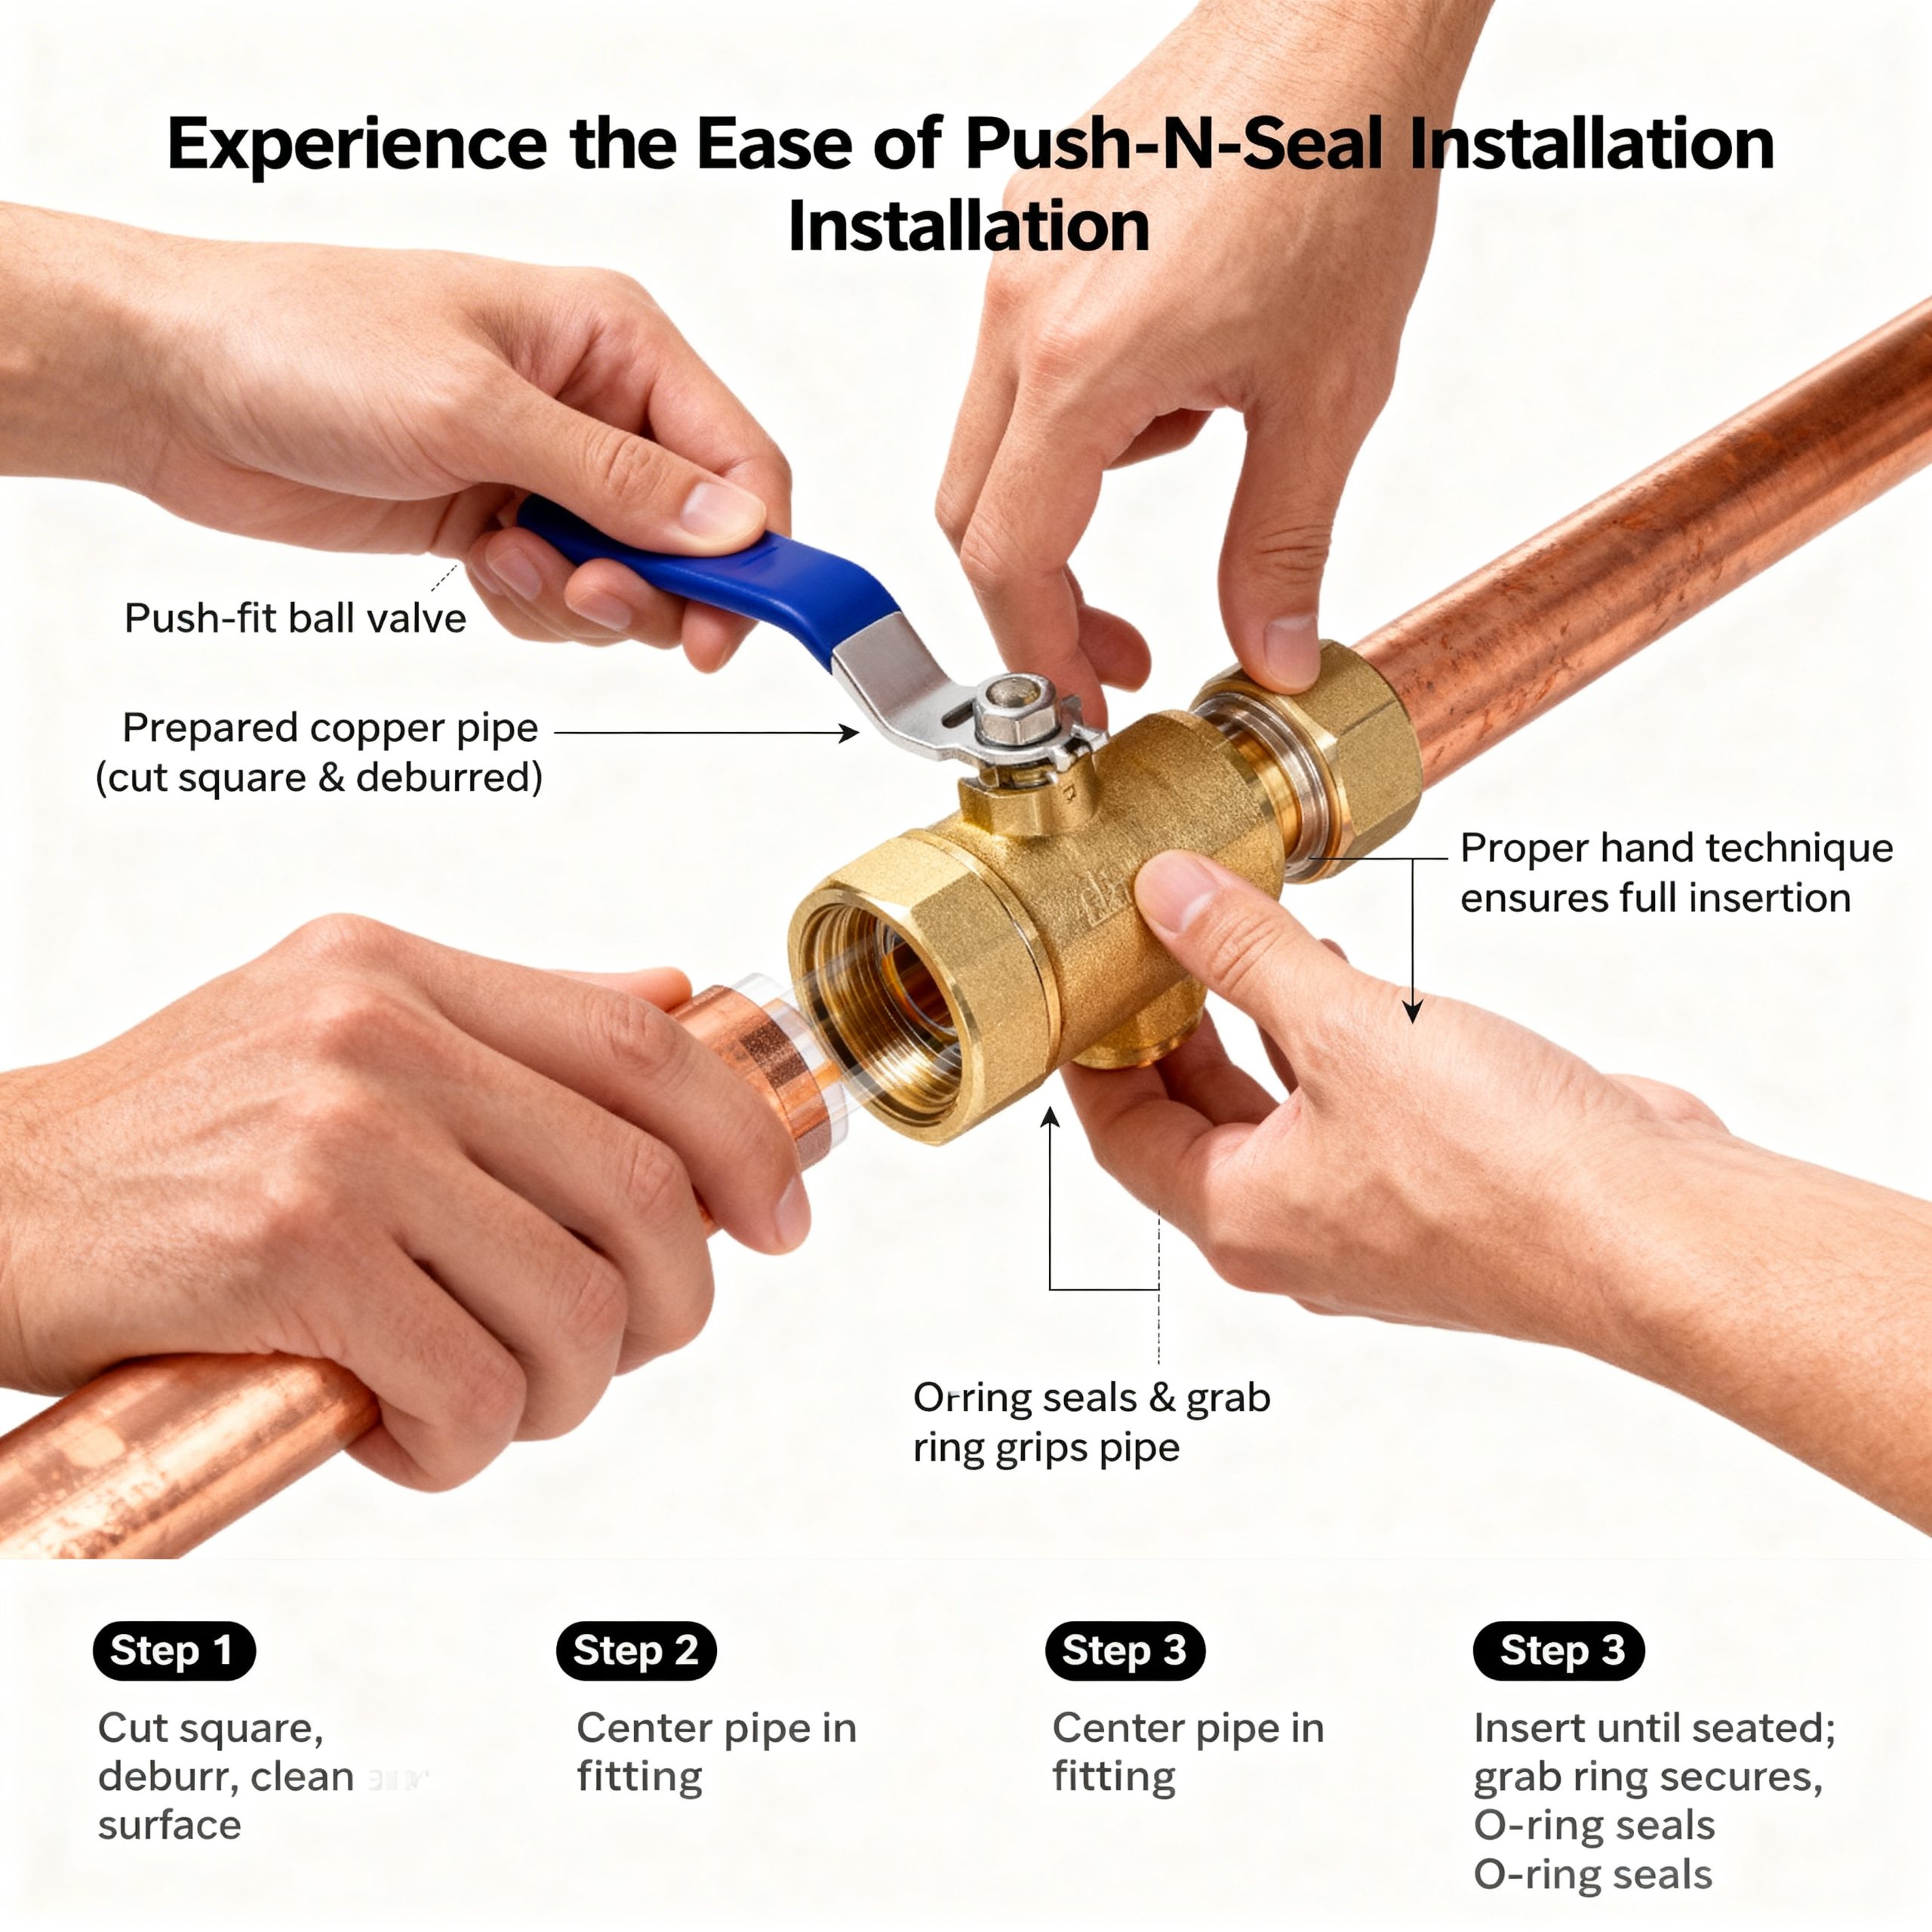
- Align the Pipe: Ensure the pipe is properly aligned with the valve opening.
- Push Firmly: Push the pipe firmly and steadily into the valve until it reaches your depth mark. You will feel and hear a slight click as the grab ring engages.
- Verify Depth: Double-check that the pipe is inserted to the marked depth.

Step 4: Verify the Connection
A quick check can prevent future headaches.
- Pull Test: Gently (but firmly) pull on the pipe away from the valve. If installed correctly, it should not budge. The grab ring should hold it securely.
- الفحص البصري: Ensure there are no gaps between the pipe and the valve’s collar, and that the mark indicates full insertion.
Step 5: Test for Leaks
The ultimate test of a successful installation.
- Restore Water Supply: Slowly turn the main water supply back on to the area.
- Inspect Thoroughly: Visually inspect the connection for any drips or seepage. Pay close attention to the point where the pipe enters the valve.
- Wait and Re-Inspect: Allow the system to pressurize fully and wait a few minutes, then re-inspect. Sometimes a slow weep can take time to appear.
Common Pitfalls to Avoid
- Unprepared Pipe Ends: Burrs, dirt, or oval pipes are primary causes of leaks.
- Insufficient Insertion: Failing to push the pipe fully to the depth mark means the O-ring won’t form a complete seal.
- Using Wrong Pipe Stiffener: Only use PEX stiffeners with PEX pipe; don’t use them with copper or CPVC unless explicitly instructed by the manufacturer.
- Damaged Valve: Always inspect the valve for any visible damage before installation.
- Not Testing: Skipping the leak test is asking for trouble down the line.
Conclusion: Master Push Connect Installation with BCST Valve
Installing a push connect ball valve is a prime example of how modern plumbing technology simplifies once-complex tasks. By following these five easy steps—proper pipe preparation, accurate depth marking, firm insertion, connection verification, and thorough leak testing—you can confidently achieve a robust, leak-free plumbing connection in no time.
BCST Valve designs and manufactures push connect fittings and valves with precision and quality in mind, ensuring they deliver dependable performance for years to come. Choose BCST for your next project and experience the ultimate ease and reliability in plumbing connections.
Ready to get started? Explore BCST’s range of reliable push connect valves!


 English
 Arabic
 Russian
 French
 Spanish