
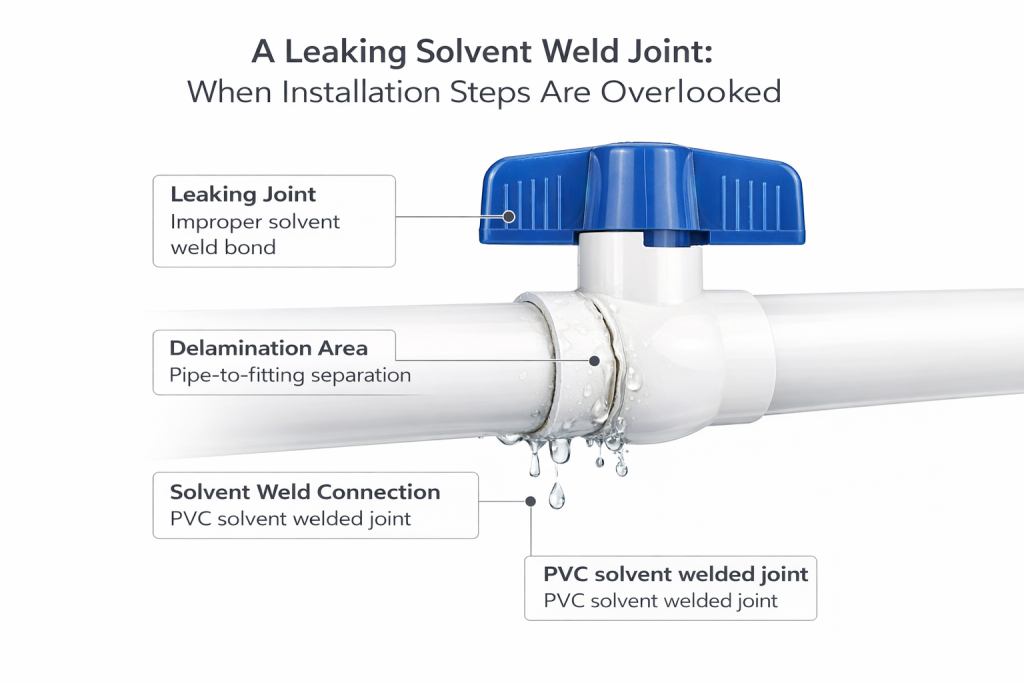
The 5-Minute Mistake That Causes a Solvent Weld Joint to Fail 3 Weeks Later
You just finished a spotless PVC pipe installation. The lines looked perfect, the connections felt solid, and you watched the pressure test hold with satisfaction. Fast forward three weeks: the phone rings. It’s a callback. A dreaded solvent weld joint leaking, seemingly out of nowhere, causing product loss, water damage, and a dent in your reputation. What went wrong?
Often, these frustrating — and preventable — failures can be traced back to what seemed like minor omissions during the welding process. This isn’t about the quality of the PVC material itself, but rather foundational installation steps that are either skipped or rushed. BCST Valve understands the nuances that lead to reliable systems. This guide will expose the “5-minute mistakes” that lead to delayed PVC glue failure and show you how to ensure your solvent welds stand the test of time.
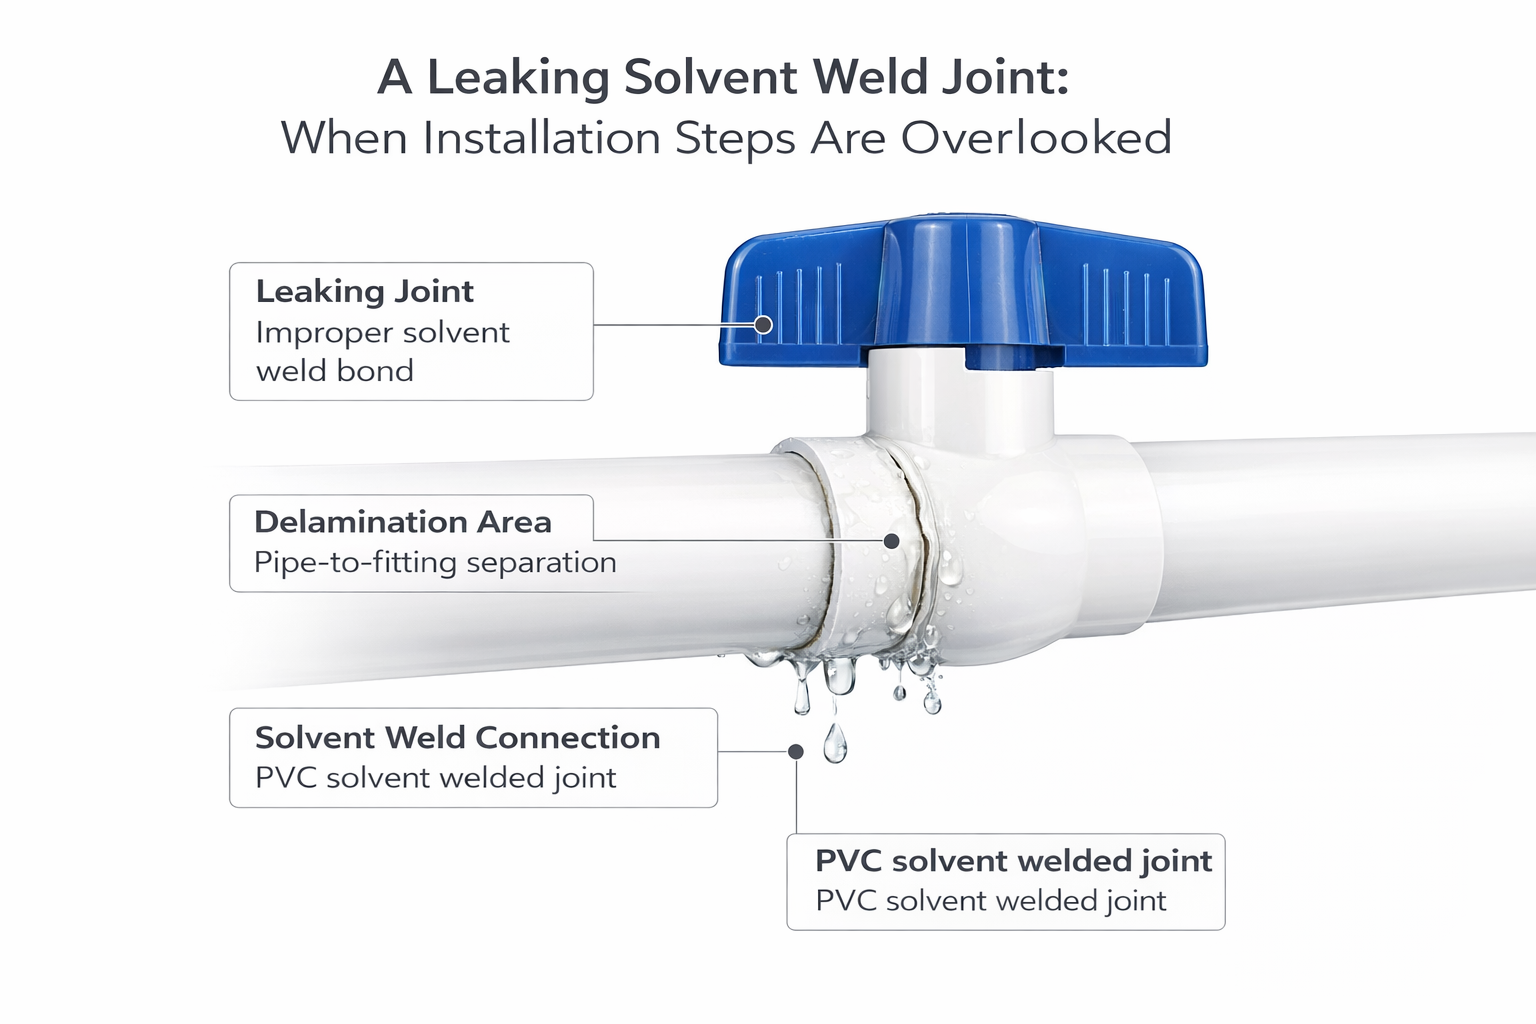
The “5-Minute Mistakes” That Lead to Delayed Failure
These seemingly small shortcuts don’t typically result in immediate leaks. Instead, they compromise the integrity of the plastic bond, leading to a weakened joint that eventually succumbs to stress, vibration, or temperature fluctuations, manifesting as a solvent weld joint leaking weeks down the line.
Mistake 1: Skipping Deburring and Chamfering
- The Shortcut: Immediately applying primer and cement after cutting, without smoothing the pipe edges.
- The Problem 3 Weeks Later: A sharp edge on the pipe can scrape away the cement from the fitting socket during insertion, creating dry spots where the weld doesn’t fully form. This reduces the effective bonding area and creates stress points, leading to eventual PVC glue failure. Additionally, burrs can obstruct flow and weaken the pipe Wall.
Mistake 2: Dirty or Wet Pipe & Fittings
- The Shortcut: Not wiping down pipe and fittings to remove dirt, grease, or moisture.
- The Problem 3 Weeks Later: Contaminants on PVC surfaces act as a barrier, preventing the primer and cement from properly softening and fusing the plastic. Moisture can also dilute the chemicals, weakening the bond. The result is a superficial weld that lacks the necessary chemical fusion, making it susceptible to failure under operational pressure.
Mistake 3: Skipping or Insufficient Primer Application
- The Shortcut: Directly applying cement, especially with clear primer, or only a light swipe of primer.
- The Problem 3 Weeks Later: Primer isn’t just a cleaner; it’s a crucial chemical pre-softener that prepares the PVC surface to accept the solvent cement. Without adequate primer, the cement cannot properly dissolve and fuse the plastic, creating a “cold” joint that lacks strength and eventually leads to a disastrous solvent weld joint leaking. The cement sits on the surface rather than becoming an integral part of the plastic.
Mistake 4: Not Giving a Quarter-Turn During Insertion
- The Shortcut: Simply pushing the pipe straight into the fitting.
- The Problem 3 Weeks Later: Pushing straight in can trap air bubbles and reduce the even distribution of cement, especially at the bottom of the fitting socket. The quarter-turn (¼ turn) distributes the cement evenly, ensures 100% surface contact, and drives the solvent deeper into the plastic for a stronger, fused weld. Without it, you get uneven adhesion and weak spots ripe for PVC glue failure.
Mistake 5: Insufficient Cure Time Before Pressure Testing
- The Shortcut: Pressure testing the system too quickly after the final weld.
- The Problem 3 Weeks Later: While a joint might appear solid, the chemical fusion process takes time to fully develop its strength. Applying pressure too soon, especially in cooler conditions or with larger diameter pipes, stresses the still-soft joint. While it might pass an immediate test, this internal stress can degrade the chemical bond, leading to a creep effect or microscopic cracks that manifest as a solvent weld joint leaking weeks later. Always refer to manufacturer guidelines for how long for solvent weld to cure.
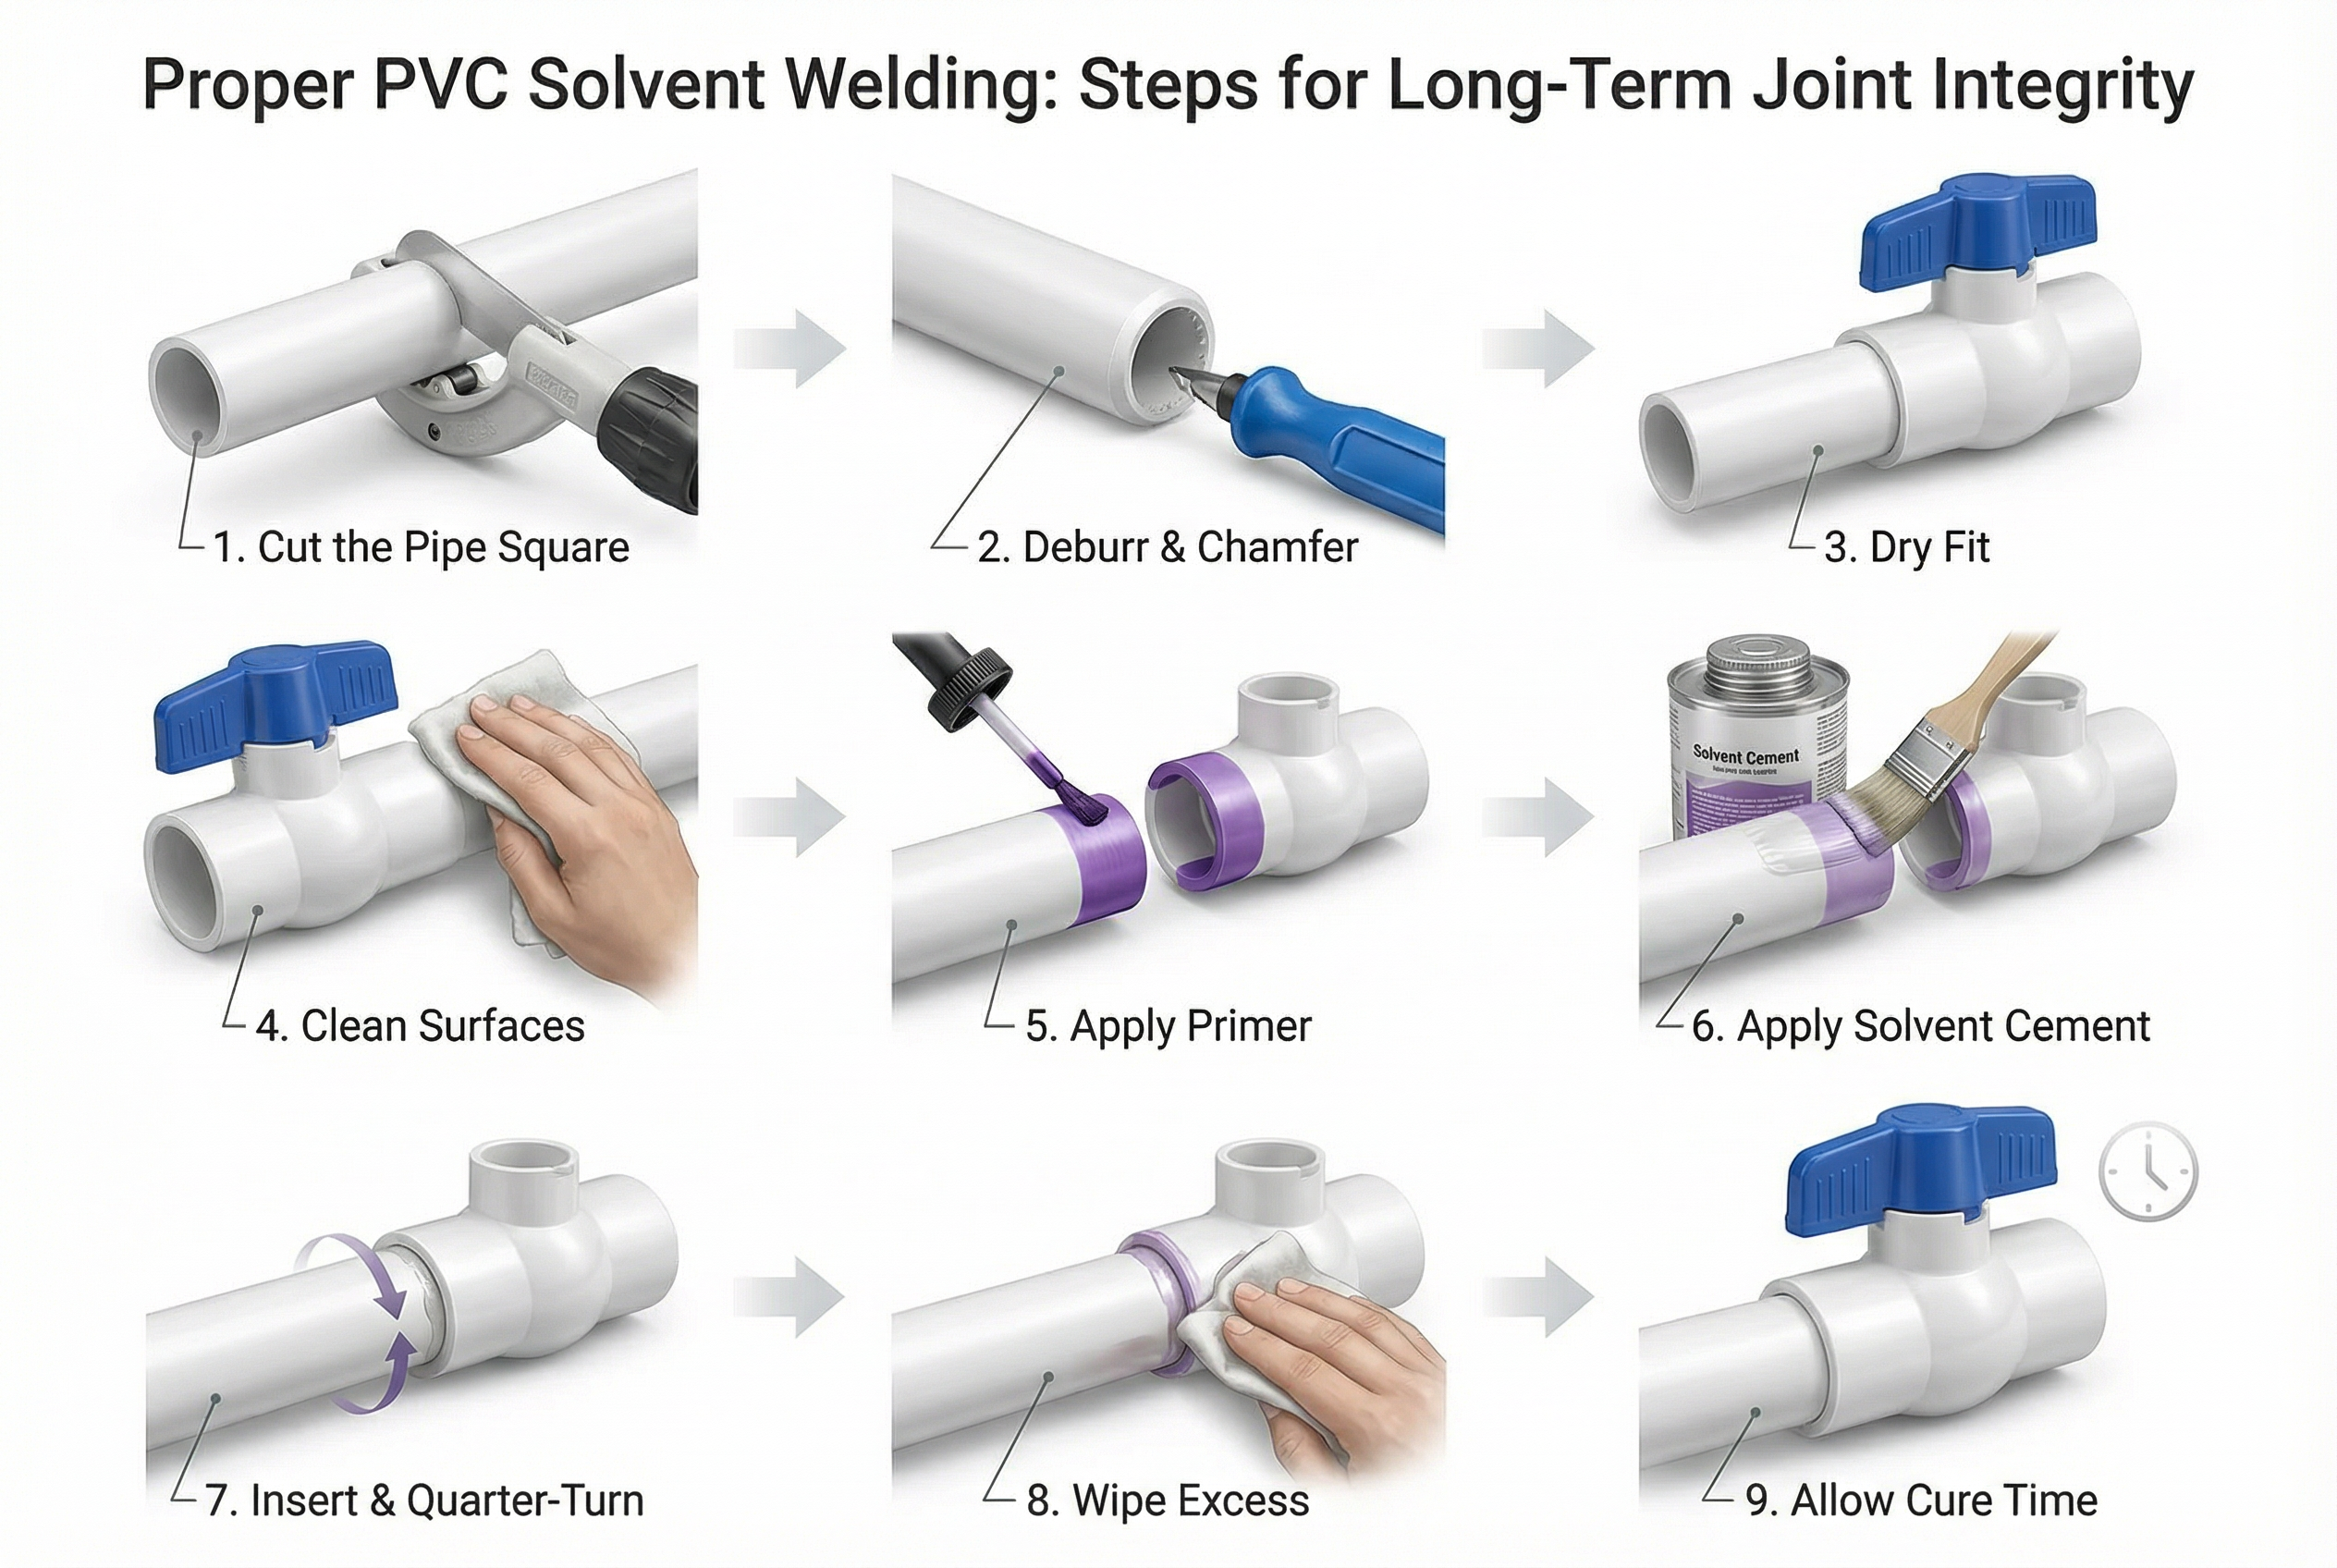
The Foolproof Process: Ensuring a Permanent, Leak-Free Weld
A successful solvent weld joint is a chemical fusion, not just a glued connection. Following these steps diligently will prevent frustrating callbacks:
- Cut the Pipe Square: Use a miter box or pipe cutter to ensure a clean, straight cut.
- Deburr and Chamfer: Remove all burrs from both the inside and outside edges of the pipe. Chamfer the outside edge of the pipe with a utility knife or deburring tool. This allows for easier insertion and prevents scraping of cement.
- Dry Fit: Insert the pipe into the fitting. It should go about 1/3 to 2/3 of the way in by hand pressure. This verifies the fit and allows for proper solvent cement distribution.
- Clean the Surfaces Thoroughly: Use a clean, dry cloth to wipe away all dirt, grease, and moisture from both the pipe end and the inside of the fitting socket.
- Apply Primer Generously: Using a natural bristle brush or dauber, apply a liberal and even coat of primer to the inside of the fitting socket (coat twice) and the outside of the pipe end (coat once for the depth of the socket plus ½ inch). Primer should still be wet when applying cement.
- Apply Solvent Cement Immediately: While the primer is still wet, apply an even, heavy coat of cement to the pipe end and a medium coat to the inside of the fitting socket.
- Insert and Quarter-Turn: Swiftly insert the pipe fully into the fitting socket, giving it a ¼-turn twist to ensure even spread. Hold firmly for 15-30 seconds to prevent the pipe from pushing out.
- Wipe Excess: Remove any excess cement from the joint exterior with a clean cloth. This prevents chemical degradation of the pipe over time.
- Allow Ample Cure Time: Follow manufacturer guidelines strictly for how long for solvent weld ball valve to cure before handling or pressure testing. This varies significantly based on pipe diameter, temperature, humidity, and the type of cement used. For example, a 2-inch PVC joint at 70°F might need 1 hour before handling, but 6 hours before pressure testing to 160 psi. Larger diameters or colder temperatures require significantly longer.
Beyond the Perfect Weld: Planning for Serviceability
Even with a perfect solvent weld, the valve itself can fail due to wear, incorrect specification, or manufacturing defects over time. When that happens, you’ll wish you had a serviceable valve instead of having to cut out your perfect joint. This kind of costly, reputation-damaging callback, especially when a solvent weld joint leaking necessitates it, is a major factor in The True Cost of a Solvent Weld Ball Valve, which goes far beyond the initial purchase price.
Instead of facing another inconvenient and expensive pipe cutting operation, consider alternatives. We show the benefit of easily replaceable inline components in From Cutting Out Failed Valves to a 10-Minute Swap: The Case for True Union.
Conclusion: Precision Prevents Pain
The frustration of a solvent weld joint leaking weeks after installation is a clear indicator that a critical step was missed. These “5-minute mistakes”—skipping deburring, neglecting cleanliness, inadequate priming, omitting the quarter-turn, and insufficient cure time—all contribute to a compromised chemical bond, leading to inevitable PVC glue failure.
By investing a few extra minutes in proper technique and understanding the crucial factors like how long for solvent weld to cure, you can ensure a reliable, leak-free system that stands the test of time. This diligence not only upholds your professional reputation but ultimately contributes to significant savings by avoiding costly callbacks and system downtime. Choose diligence, choose reliability.
Need reliable PVC valves that support professional installation?


 English
 Arabic
 Russian
 French
 Spanish