
How Do You Ensure a Flawless Butterfly Control Valve Replacement?
A botched butterfly control valve replacement brings your process to a halt, wasting time and money. Without a clear plan, you risk turning a simple upgrade into a major operational headache.
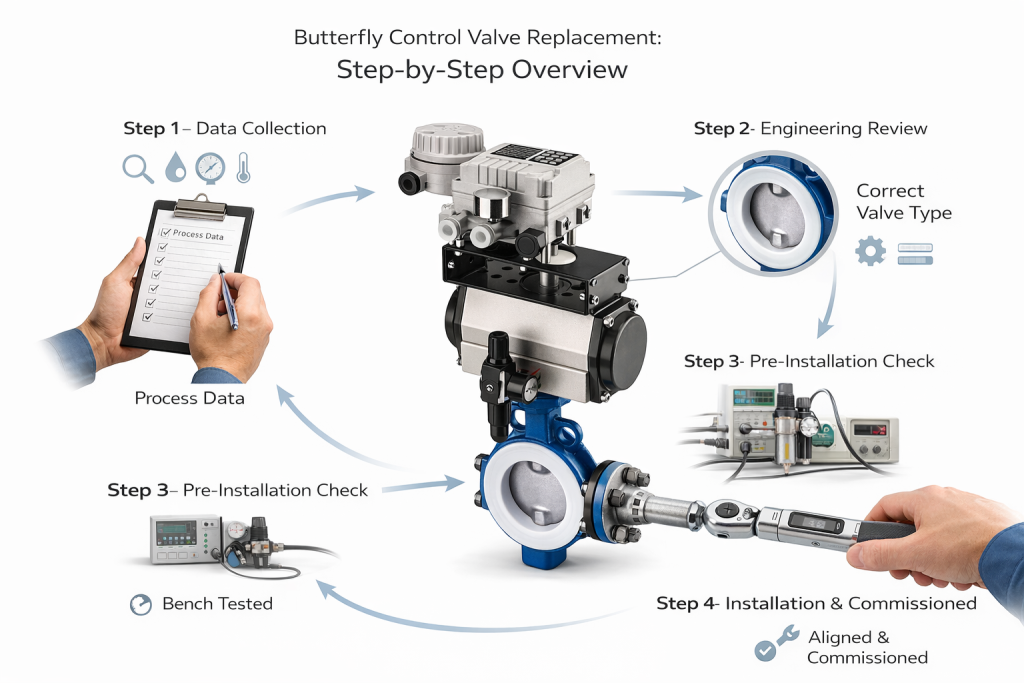
A successful butterfly control valve replacement requires a disciplined, five-step process. You must focus on detailed data collection, thorough engineering review, pre-installation checks, precise installation, and finally, performance validation. This record is crucial for proving the full operational ROI of modern valve upgrades to management and setting the stage for future projects. This structured approach minimizes downtime and maximizes your return on investment.
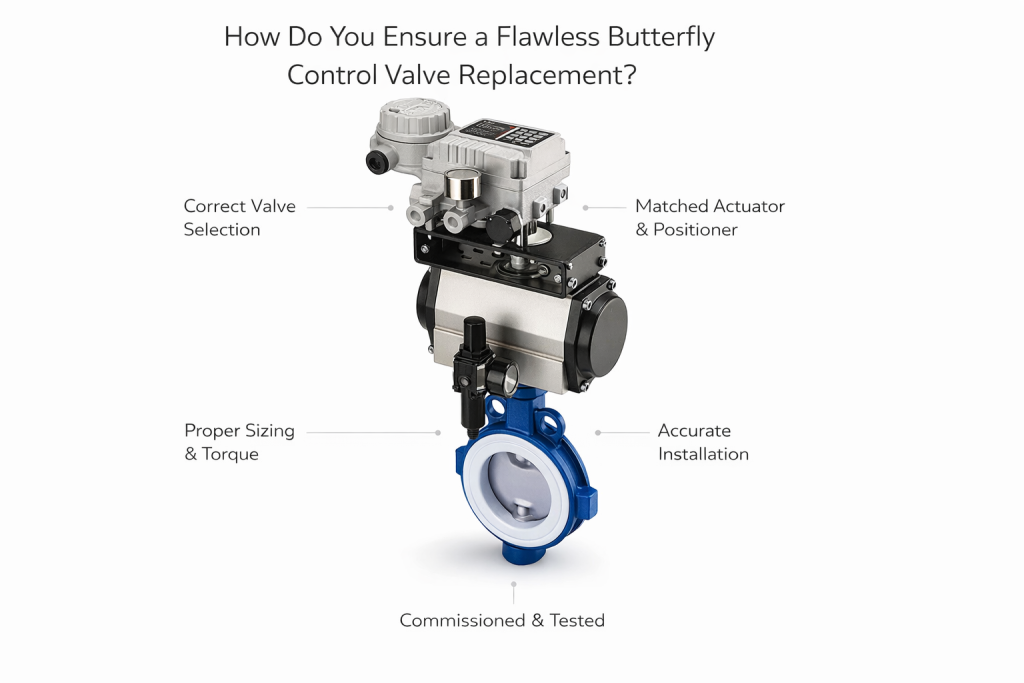
You’ve already made the smart decision to upgrade a problem valve. Now, the execution phase is what separates a successful project from a frustrating one. Emily has seen many clients invest in the best valve technology, only to have the project stumble during installation. Our Chief Engineer, Hassan, always emphasizes, “A rigorous process for every critical valve replacement guarantees safety, reliability, and performance. You must treat it like a mini-project. Without a structured plan, you risk turning that simple upgrade into a major plant headache.” Following a proven method ensures the benefits you expect on paper are the results you get in the pipeline.
Why Are the First Two Steps the Most Critical for Success?
You might be tempted to order a direct replacement to save time. This common mistake often leads to repeating the same failure, because it ignores why the old valve failed in the first place.
The first two steps, Data Collection and Engineering Review, are the foundation of a successful replacement. They force you to diagnose the root cause of the previous valve’s failure and select a new valve technology that is correctly engineered for the actual demands of your specific application.
From Data Gathering to an Engineered Solution
The question, “Why are the first two steps the most critical for success?” highlights the difference between simply replacing parts and engineering a lasting solution. Hassan considers this the “intellectual” phase of the job, where a successful outcome is determined long before a wrench is ever turned. Just ordering the same model valve is a gamble. It assumes that the original valve was chosen correctly and that process conditions haven’t changed. In a dynamic plant environment, these are often bad assumptions. Taking the time to properly diagnose the problem saves immense time and money down the road.
Step 1: Data Collection and Problem Definition
This is the most important part of the entire butterfly control valve replacement process. You act like a detective, gathering every clue you can find.
- Process Conditions: You must document everything about the fluid: its name, its chemical composition, whether it has solids, and its abrasiveness or corrosivity. You also need the full range of operating conditions, including minimum, normal, and maximum pressure, temperature, and flow rate. Without this complete picture, proper sizing is impossible.
- Existing Valve Performance: Go to the maintenance records. Why are you replacing this valve? What is its failure mode? Is it leaking through the seat? Is it leaking from the stem packing? Is it sticking? How often has it been repaired? Talking to the operators who work with the loop every day can also provide invaluable insights that are not in the official records.
- Physical and Installation Constraints: You need the hard facts about the installation. Get a tape measure and verify the pipe size, the flange type and pressure rating (e.g., ANSI Class 150 or 300), and the exact face-to-face dimension of the existing valve. Note any obstructions above or around the valve that might limit the size or type of butterfly valve with actuator you can install.
Step 2: Engineering Review and Technology Selection
With all your data collected, you can now make an informed engineering decision. Using the process data, your engineering team can properly size the new control valve. This ensures the valve operates within its ideal control range (typically between 20% and 80% open) for most of the time, providing the best possible stability. Industry guidelines stress piping sketches, hydraulics, and pressure drop analysis for proper valve selection.
- Root Cause Analysis: First, determine why the old valve failed. If a concentric valve with a rubber seat failed in a high-temperature or abrasive service, the root cause was a poor initial selection. The solution is not another concentric valve; it’s an upgrade to a different butterfly valve type, like a high-performance or triple-offset valve with metal seats and hardened trim.
- Sizing and Selection: Using the process data, your engineering team can properly size the new control valve. This ensures the valve operates within its ideal control range (typically between 20% and 80% open) for most of the time, providing the best possible stability.
- اختيار المواد: Based on the fluid’s chemistry and temperature, you will select the right materials for the body, disc, stem, and seat to ensure long life and prevent corrosion. This is where expertise really matters. For example, selecting 316 Stainless Steel is common, but in a service with chlorides, a material like Hastelloy C or Duplex might be required to prevent pitting corrosion. This single choice can be the difference between a valve lasting one year versus ten years.
How Do You Prevent Installation Errors That Cause Downtime?
You have the perfect, correctly-engineered valve assembly sitting on your workshop floor. Now, the project is in the hands of the installation crew. Simple mistakes at this stage can lead to leaks, a damaged valve, and an immediate failure upon startup.
You can prevent installation errors by performing meticulous pre-installation checks, including a bench test. During the actual installation, you must enforce strict adherence to safety procedures, ensure proper flange alignment, and use correct bolt tightening patterns and torque values to avoid damage.
From the Workbench to a Leak-Free Startup
The question, “How do you prevent installation errors that cause downtime?”, focuses on the hands-on execution of the plan. This is where meticulous attention to detail pays off. Hassan often says, “The last 5% of the job determines 95% of its success.” A rushed or careless installation can completely ruin a perfectly specified and manufactured valve. The goal is to make the startup uneventful. A boring startup is a successful startup. This is achieved by following a clear, methodical process from the moment the valve arrives.
Step 3: Procurement and Pre-Installation Checks
This step happens before the old valve is ever removed from the line.
- Verify the Delivery: When the new butterfly control valve assembly arrives, the first thing you do is check it against the purchase order. Does the tag on the valve match the specifications? Is it the right size, material, and pressure class? Is the actuator the correct model with the right fail-safe action? Finding a mistake here saves you from shutting down a process only to realize you have the wrong part.
- Perform a Bench Test: This is a simple but incredibly valuable check. On a workbench, connect the actuator to a temporary air supply and the positioner to a signal generator (like a 4-20mA calibrator). Stroke the valve from fully closed to fully open and back again. Does it move smoothly? Does the positioner reading match the actual valve position? This test confirms that the valve isn’t damaged from shipping, the actuator is functional, and the positioner is calibrated correctly. Finding a problem here takes 30 minutes to fix, while finding it after the valve is installed could take a full day and require another shutdown.
Step 4: Installation and Commissioning
This is the main event.
- Safety First: The absolute priority is safety. Follow your plant’s Lockout-Tagout (LOTO) procedures to the letter. Ensure the line is fully isolated, depressurized, drained, and verified to be safe before anyone unbolts the old valve.
- Alignment is Everything: A common and costly mistake is using the valve to pull misaligned pipe flanges together. This puts immense stress on the valve body, warping it and causing the disc to bind or the seat to leak. The pipe flanges must be parallel and aligned قبل the valve is installed. Use proper rigging to support the valve; do not let it hang from the bolts.
- Bolting Procedure: Always use a star or crisscross pattern when tightening flange bolts. This ensures the pressure is applied evenly across the gasket surface. Use a calibrated torque wrench and follow the manufacturer’s specified torque values for the bolts you are using. Overtightening can crush the gasket or warp the valve body, while under-tightening will result in a leak.
- التكليف: Once the new valve is installed, the startup should be done slowly and carefully. Reintroduce pressure to the system gradually and check all flange connections for leaks. Then, from the control room, stroke the valve and confirm it is responding correctly to the control signal.
By following these practical steps, you ensure that your butterfly control valve replacement project is a predictable, efficient, and successful process that delivers immediate and lasting value to your plant.
خاتمة
A successful butterfly control valve replacement is not left to chance; it’s the result of diligent planning and precise execution. Following this five-step process—from thorough data collection and expert engineering review to meticulous pre-installation checks, careful installation, and final performance validation—transforms a potentially risky task into a predictable, high-return project. This structured approach ensures you get the performance, reliability, and efficiency you paid for, minimizing downtime and maximizing the operational ROI of your upgraded valve systems.
Ready for your next flawless valve replacement project?


 English
 Arabic
 Russian
 French
 Spanish