
Are You Doing Pop Testing in the Right Way?
That test lever on the top of a предохранительный клапан is not a toy. In-service pop testing is a required and critical task, but it’s also one of the most hazardous if done improperly. An incorrect test can damage the valve, disrupt your process, or worse, cause an injury.
Performing an in-service test on a safety valve confirms it will open at the correct pressure, ensuring it hasn’t seized from corrosion or fouling. This guide provides a safe work procedure to help your technicians meet regulatory requirements while minimizing risk.

What is the Most Important Rule Before You Touch the Test Lever?
Before you pull the lever, you must verify that the current system pressure is at or above 75% of the safety valve’s stamped set pressure. Testing below this threshold can cause the valve to open improperly and fail to reseat, leading to a continuous and dangerous leak.
This is not just best practice; as one study implies, it’s a fundamental safety gate. You must verify pressure, temperature, and all permit requirements before you touch anything.
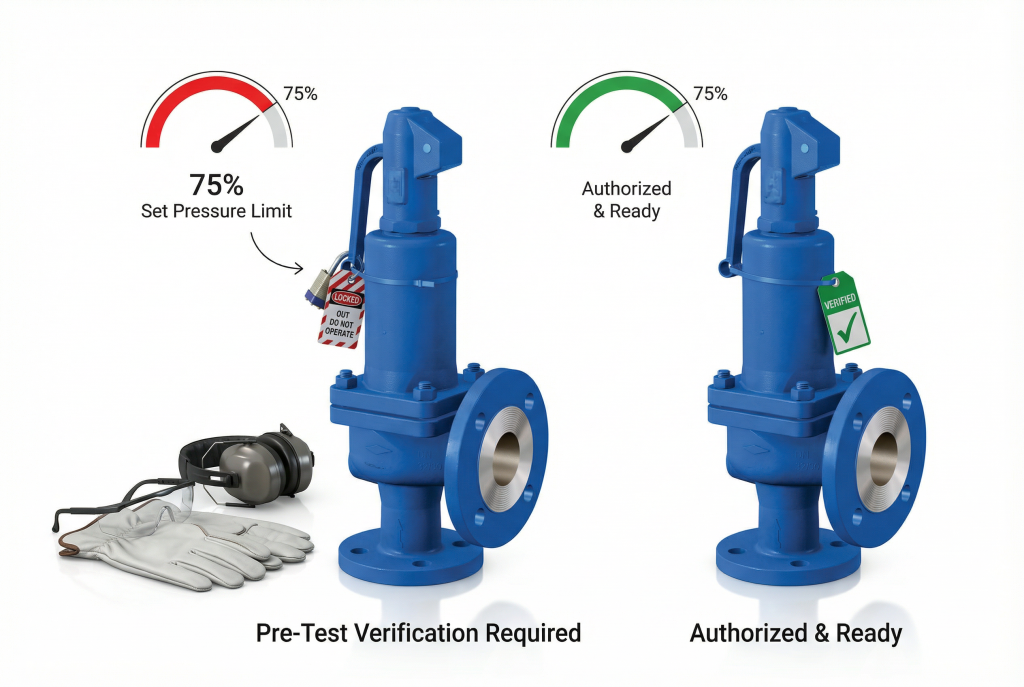
The Pre-Test Safety & Planning Checklist
A successful test is 90% preparation. This checklist should be a mandatory part of your safe work procedure.
- Authorization and Communication:
- Obtain a signed work permit.
- Notify the control room operator.
- Clear non-essential personnel from the area.
- The 75% Rule Verification:
- Confirm the set pressure stamped on the valve’s nameplate.
- Verify current system pressure on a calibrated local gauge.
- Calculate the Threshold: Ensure system pressure ≥ (Set Pressure x 0.75).
- Equipment and PPE:
- Mandatory PPE: Hard hat, high-impact safety glasses, and high-decibel hearing protection.
How Do You Perform the Actual Pop Test Safely?
The action should be confident, quick, and precise. Grasp the test lever firmly, pull with a quick motion to fully open the valve, hold for 2-3 seconds, then release it smartly so it can snap shut.

The Step-by-Step Test, Observation, and Reset
- Step 1: The Action. Position yourself safely. Grasp the lever and pull with a quick, smooth motion. Do not “ease” into it. Hold for 2-3 seconds.
- Step 2: The Observation. Listen for a loud, distinct “POP.” A “hissing” or “simmering” sound indicates a problem (weak lift). Do not continue; release the lever and document the weak test.
- Step 3: The Release and Reseat. Release the lever quickly to let it snap shut. Listen for the flow to stop.
- Step 4: Check for Leaks. Listen carefully at the valve outlet. If you hear a continuous hissing sound, the valve has not reseated correctly. Report this to the control room immediately.
- Step 5: Document Everything. Record the date, time, valve tag, system pressure, your name, and the result (e.g., “Good pop, reseated correctly” or “Weak lift, simmering”).
Заключение
In-service pop testing is a procedure with no shortcuts. Meticulous planning, strict adherence to the 75% rule, and careful post-test observation are what separate a successful test from a costly failure. This guide provides the framework for a safe and effective procedure that ensures your most critical safety assets are ready to perform when needed most.


 English
 Arabic
 Russian
 French
 Spanish