
Is it Difficult to Access the Ball Valve for You?
Ever found yourself staring at a critical water shutoff valve buried behind a water heater, deep inside a muddy irrigation box, or tucked away in a dark corner of the ceiling? In those moments, fumbling for a wrench or struggling to get enough leverage isn’t just frustrating—it’s a massive waste of time and can be downright unsafe in an emergency. The solution is simpler and more affordable than you think. A ball valve handle extension brings control directly to you, making that inaccessible valve as easy to operate as one right in front of you. This guide will walk you through everything you need to know, from choosing the right material to a step-by-step installation, ensuring you save time, money, and effort.
A ball valve handle extension is a mechanical device that extends the reach of your valve handle, typically 6-36 inches, allowing you to operate valves in hard-to-reach locations without tools or modification to the valve itself.
What is Ball Valve Handle Extension?
You know you need to reach a distant valve, but what exactly is a handle extension, and how does it work without replacing the entire valve?
A ball valve handle extension is a retrofit device designed to securely attach to your existing valve handle’s mounting point. It functions as a rigid, straight-line linkage, transferring the simple quarter-turn motion from a new, accessible handle directly to the valve’s stem, giving you full operational control from a distance.

The beauty of a handle extension is its simplicity. It’s an engineered solution that solves a common problem without requiring you to cut pipes or call a plumber for a major overhaul. Let’s dive deeper into the mechanics and the key applications where these devices are indispensable.
Dive Deeper: Functionality and Applications
How Ball Valve Handle Extensions Work
The core principle is direct mechanical transfer. Most extensions connect via one of two methods:
- Threaded Connection: The most common type. The extension has a male or female threaded end that screws directly onto the valve’s handle nut stud.
- Clamp-On/Set-Screw: Universal models use a clamp or set-screw mechanism to grip the stud or the base of the handle itself.
Once connected, the rigid rod ensures that when you turn the new T-handle or lever at the top, the force is transferred with minimal loss, rotating the valve stem the required 90 degrees. The key is that it doesn’t increase leverage like a “cheater bar”; it simply relocates the point of operation.
Common Applications Where Extensions Are Essential
- Underground Valve Access: The #1 use case. Perfect for irrigation systems, septic tank shutoffs, and main water lines located in underground boxes.
- Behind-Wall Installations: Accessing shutoffs for showers, washing machines, or ice makers without cutting large holes in the drywall.
- Confined Spaces: Operating valves behind bulky equipment like boilers, water heaters, or industrial machinery.
- Pool and Spa Systems: Centralizing the control of multiple valves hidden around the pump and filter equipment onto one easy-to-reach panel.
- Emergency Shutoff Accessibility: Ensuring that critical shutoff valves are clearly visible and immediately accessible, as often required by safety codes.
Ball Valve Handle Extension vs. Stem Extension Ball Valve: Understanding the Difference
You’re exploring your options and hear two terms: “handle extension” and “stem extension valve.” Are they the same thing? Absolutely not, and choosing the wrong one can lead to project delays and unnecessary costs.
A ball valve handle extension is a simple, cost-effective retrofit kit that attaches to your existing valve. A stem extension ball valve is a brand-new valve manufactured with a permanently extended, factory-sealed stem, requiring a full replacement of your old valve.

I’ve seen many clients over-engineer a solution because they weren’t aware of the simple retrofit option. For 90% of residential and light commercial accessibility problems, a handle extension is the smarter, faster, and more affordable choice. Let’s break down the key differences.
Dive Deeper: Making the Right Choice for Your Project
| Feature | Ball Valve Handle Extension | Stem Extension Ball Valve |
|---|---|---|
| Installation | Attaches to existing valve; no plumbing needed. | Requires cutting pipe; full valve replacement. |
| Cost | Low | High |
| Flexibility | Removable, adjustable, and transferrable. | Permanent and fixed. |
| Best For | Retrofitting existing, hard-to-reach valves. | New construction or code-mandated installs. |
| DIY Friendly? | Yes, very. (10-15 minutes) | No, requires professional plumbing skills. |
When to Choose a Handle Extension
Choose the simple handle extension in these scenarios:
- You have an existing valve that works perfectly but is just hard to reach.
- You’re on a tight budget and need a fast, effective solution.
- You are in a rental property and cannot make permanent changes to the plumbing.
- You want a quick fix you can install yourself in minutes.
When to Choose a Stem Extension Valve
A full stem extension valve is necessary when:
- It is a new construction project and specified in the plumbing plan.
- Local building codes mandate a factory-sealed stem (e.g., for gas lines or certain buried services).
- The application involves very high pressure or torque where an integrated design adds a layer of safety.
What’s the Best Material for a Ball Valve Handle Extension?
You’ve found an extension, but it’s plastic. Will it hold up outdoors? Or you see a pricey stainless steel one—is it worth it? The material you choose is the single most important factor determining the longevity and reliability of your extension.
For general residential and irrigation use, a high-quality PVC ball valve handle extension offers excellent corrosion resistance and value. For industrial, marine, or high-temperature applications where strength and longevity are critical, a stainless steel ball valve handle extension is the only professional choice.
My father’s first lesson to me on the factory floor was this: “The right material for the job is the one that will still be working in ten years.” Let’s analyze the options so you can choose a material that lasts.
Dive Deeper: A Complete Material Breakdown
PVC Ball Valve Handle Extension
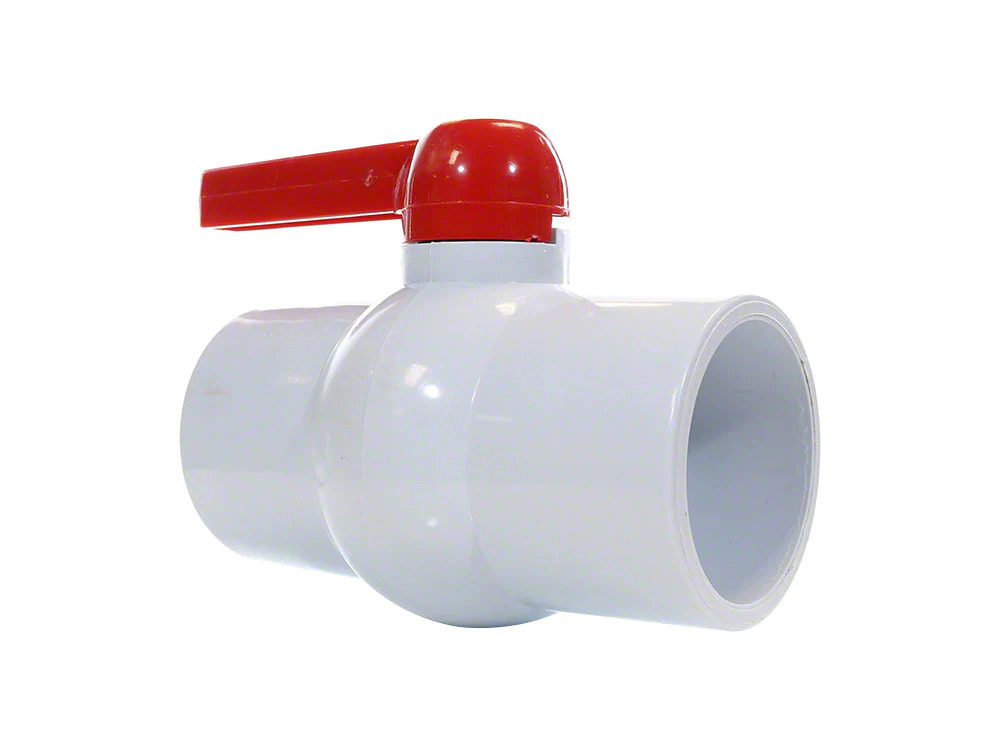
- Analysis: PVC (Polyvinyl Chloride) is a lightweight, rigid thermoplastic. It’s completely waterproof and immune to rust or corrosion from most soils and common chemicals.
- Pros: Very cost-effective ($10-$30), easy to cut to a custom length, and will not corrode.
- Cons: Can become brittle in freezing temperatures, has a low temperature limit (approx. 140°F), and has lower torque strength than metal.
- Best For: Irrigation valve boxes, pool and spa systems, and general residential use in moderate climates.
Stainless Steel Ball Valve Handle Extension
- Analysis: This is the premium, professional-grade option. Typically made from 304 or 316 (marine-grade) stainless steel, it offers superior strength and environmental resistance.
- Pros: Extremely high torque capacity, operates in a huge temperature range (-40°F to 500°F+), and is highly resistant to corrosion, rust, and UV degradation.
- Cons: Higher initial cost ($40-$150).
- Best For: Industrial facilities, commercial buildings, marine environments, high-temperature lines, and any application where failure is not an option.
Other Materials
- Brass and Bronze: Offer excellent corrosion resistance, especially in marine environments, but are often heavier and more expensive than stainless steel for similar performance.
- Aluminum: Lightweight and strong, but requires an anodized or painted coating to prevent corrosion over time, especially in damp environments.
- Reinforced Nylon/Composites: Modern engineered plastics can offer a good balance of strength and chemical resistance at a mid-range price point, but their long-term durability under UV exposure can vary by brand.
What Are the Different Ball Valve Handle Extension Configurations?
You’re ready to buy, but the product description says “1/2 inch male connection.” What does that mean, and will it fit your valve? Understanding connection types is essential for a hassle-free, first-time-right installation.
Extensions primarily use male or female threaded ends to connect to the valve’s handle bolt. A male ball valve handle extension is the most common, designed to screw directly onto the threaded stud where your old handle nut was. Universal fittings are also available but often represent a compromise in strength.
At BCST, our focus is always on creating the most robust and reliable connection. For extensions, this almost always means a direct-threaded metal-on-metal connection. Let’s look at the options.
Dive Deeper: Choosing Your Connection Type
Male Ball Valve Handle Extension
- What it is: The extension rod has external threads (like a bolt). Standard sizes are typically 1/4″, 3/8″, or 1/2″.
- How it works: You remove the nut from your existing valve handle, remove the handle, and then screw the male extension directly onto the exposed threaded stud.
- This is the most secure and common connection type for retrofit extensions.
Female Ball Valve Handle Extension
- What it is: The extension rod has internal threads (like a nut).
- How it works: This type requires an adapter. You would first screw a double-ended male adapter onto your valve’s stud, and then screw the female extension onto that adapter. It offers more adaptability but adds a potential failure point.
Universal/Adjustable Connection Extensions
- What it is: These kits use a clamp-style mechanism with set screws to grip onto the valve’s stud or stem.
- How it works: They can fit a wide range of valve brands and sizes, making them versatile. However, their reliance on friction makes them more susceptible to slipping under high torque compared to a direct-threaded connection. They are a good “catch-all” solution for DIYers facing an unknown valve type.
Ball Valve Handle Extension Effect on Operating Torque and Ergonomics
Studies comparing different valve types in 1/2‑ and 3/4‑inch sizes show that ball valves already have relatively low operating torque and head loss, so adding handle length mainly improves ergonomics (less effort for the same torque) rather than changing hydraulic characteristics.
How to Choose the Right Ball Valve Handle Extension
You’re faced with a wall of options online. How do you narrow it down to the one that will fit perfectly and last for years?
Choosing the right extension is a simple, four-step process: 1) Measure the required length, 2) Identify your valve’s handle connection, 3) Determine the correct material for the environment, and 4) Select a connection type that matches your valve.
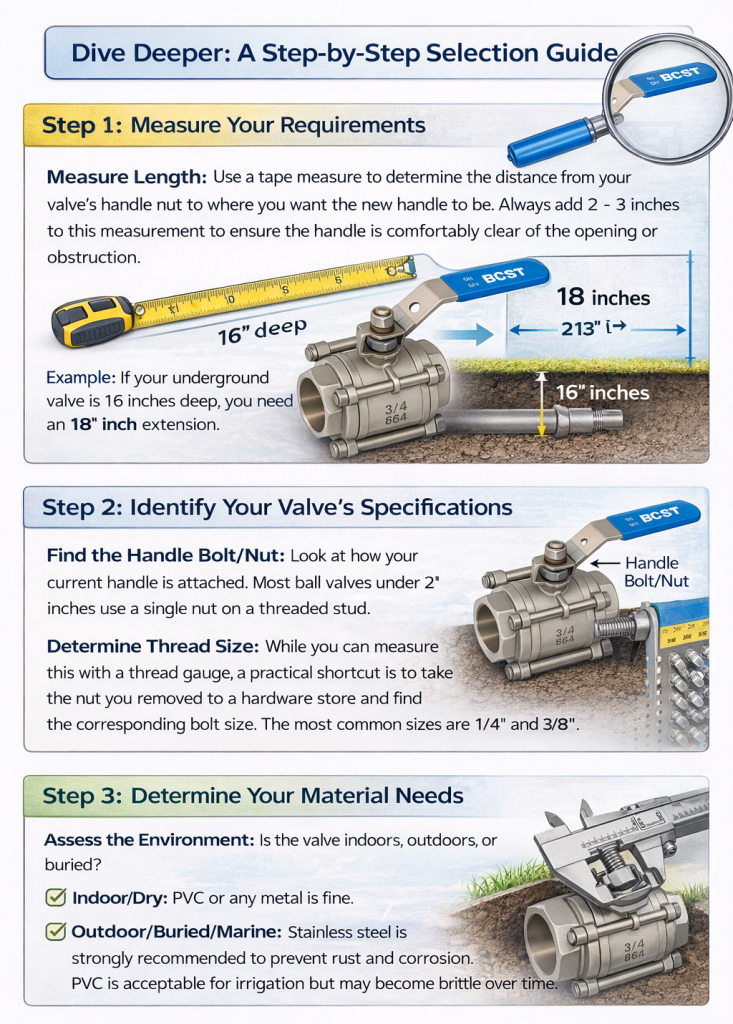
Taking ten minutes to follow these steps will save you the headache of returns and project delays. Let’s walk through the process we guide our own customers through every day.
Dive Deeper: A Step-by-Step Selection Guide
Step 1: Measure Your Requirements
- Measure Length: Use a tape measure to determine the distance from your valve’s handle nut to where you want the new handle to be. Always add 2-3 inches to this measurement to ensure the handle is comfortably clear of the opening or obstruction.
- Example: If your underground valve is 16 inches deep, you need an 18-inch extension.
Step 2: Identify Your Valve’s Specifications
- Find the Handle Bolt/Nut: Look at how your current handle is attached. Most ball valves under 2 inches use a single nut on a threaded stud.
- Determine Thread Size: While you can measure this with a thread gauge, a practical shortcut is to take the nut you removed to a hardware store and find the corresponding bolt size. The most common sizes are 1/4″ and 3/8″.
Step 3: Determine Your Material Needs
- Assess the Environment: Is the valve indoors, outdoors, or buried?
- Indoor/Dry: PVC or any metal is fine.
- Outdoor/Buried/Marine: Stainless steel is strongly recommended to prevent rust and corrosion. PVC is acceptable for irrigation but may become brittle over time.
Step 4: Choose Your Connection Type
- Based on Step 2, you’ll know the thread size of your valve’s stud. Now simply purchase a male ball valve handle extension with the matching thread size (e.g., “1/4-inch Male Threaded Extension”). This direct-fit method is the most reliable.
Installation Guide: How to Install a Ball Valve Handle Extension in Under 15 Minutes
You’ve got the right extension in hand. It’s time to install it. Don’t worry—this is one of the easiest plumbing-related tasks you can do, and it requires no special skills.
Installation is a simple, three-phase process: 1) Prepare the valve by removing the old handle, 2) Install the extension by threading it on securely, and 3) Attach the new handle and test its operation.

Let’s walk through the exact steps for a perfect, leak-free, and robust installation.
Dive Deeper: A Professional Step-by-Step Guide
Pre-Installation Preparation
- Required Tools: An adjustable wrench or a socket set, and possibly pliers.
- Optional but Recommended: A roll of PTFE thread sealant tape.
- Safety: While you aren’t modifying the plumbing, it’s always good practice to know where your main water shutoff is, just in case.
Step-by-Step Installation Instructions
Phase 1: Valve Preparation
- Close the Valve: Turn the existing handle to the “Off” position.
- Remove the Handle Nut: Use your wrench or socket to loosen and remove the nut holding the handle in place.
- Remove the Handle: Lift the handle straight off the valve’s threaded stud.
- Clean the Threads: Use a clean rag to wipe any dirt or debris from the exposed threads on the valve stud.
Phase 2: Extension Installation
- Apply Thread Sealant (Optional but Recommended): For metal-on-metal connections, wrap the valve’s stud threads 3-4 times with PTFE tape in the same direction you will tighten the extension (clockwise). This prevents the connection from vibrating loose over time.
- Thread the Extension On: Hand-tighten the extension onto the stud.
- Final Tightening: Use your wrench to give it another quarter-to-half turn. It should be snug and firm, but do not over-tighten, as this can damage the valve’s stud.
Phase 3: Handle Attachment and Testing
- Attach the New Handle: Most extensions come with a T-handle. Secure it to the top of the extension rod with the provided nut or bolt.
- Test the Operation: Slowly turn the new handle from the fully closed to the fully open position. It should move smoothly without any binding or grinding.
- You’re Done! You now have easy access to your valve.
Conclusion
A ball valve handle extension is more than just a piece of hardware; it’s a simple, elegant solution to a frustrating and common problem. It empowers you to take control of your plumbing, irrigation, or industrial systems safely and conveniently. By understanding the critical difference between a simple retrofit handle extension and a full stem extension valve, selecting the right material for your environment—like rugged stainless steel for outdoor use or cost-effective PVC for irrigation—and following a few simple installation steps, you can permanently solve an accessibility issue in minutes.
Don’t let a hard-to-reach valve be a problem any longer. Assess your needs, choose a quality extension, and give yourself the gift of easy access and peace of mind.
Ready to make your valves accessible?


 English
 Arabic
 Russian
 French
 Spanish